You want a bedroom that feels like your own small venue. A wall that wears your music taste on its sleeve. Album covers, posters, and a few frames that tell your story. If your space is tight, you still want a bold look.
I made this post because I keep seeing people want a simple way to show their love of music at home. They want something affordable, easy to change, and not too busy. Walls should speak your language, not sit blank.
If you love indie, hip hop, classic rock, or any playlist that shapes your day, this one is for you. You care about how your room feels when you walk in and when you turn out the light. You want a look that fits your style and your budget.
Here you go: 25 album cover wall decor ideas that work in small rooms and big moods. You’ll find tips on framing, layout, and lighting. You can mix posters, canvas prints, and even vinyl records. There are budget-friendly options and DIY ideas to try this weekend.
From a clean grid to a bold, playful mix, this guide shows practical ways to hang art that fits your vibe. You can start with a simple plan on the floor, then move to the wall. I cover what frames to use, what colors work, and how to light the wall for warmth.
By the end, you will have a plan you can use this weekend. You will know how to pick prints, arrange them, and keep the look neat as you grow your music collection. Ready to turn your wall into a personal mixtape? Let’s start planning and build a space you love to wake up in.
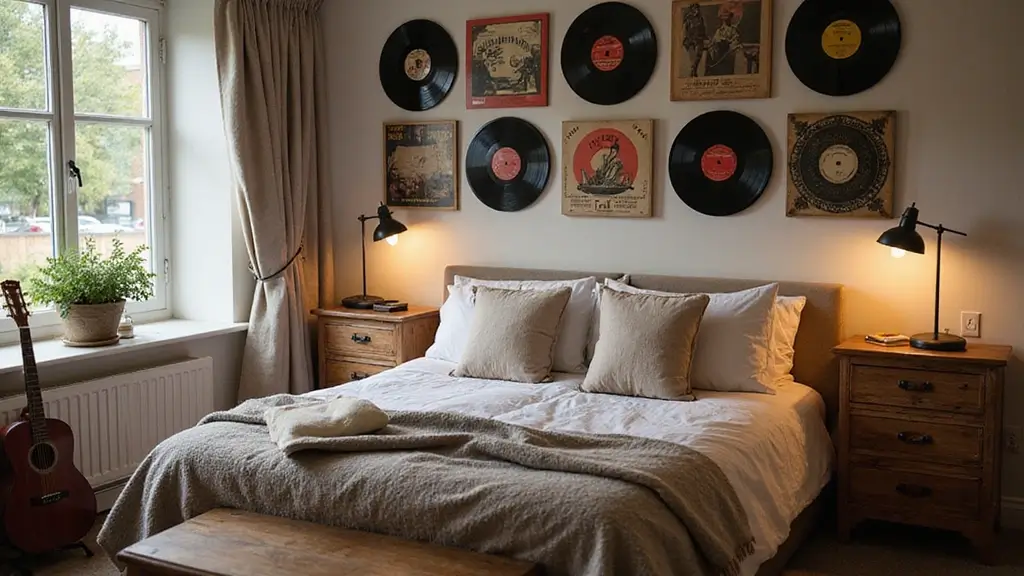
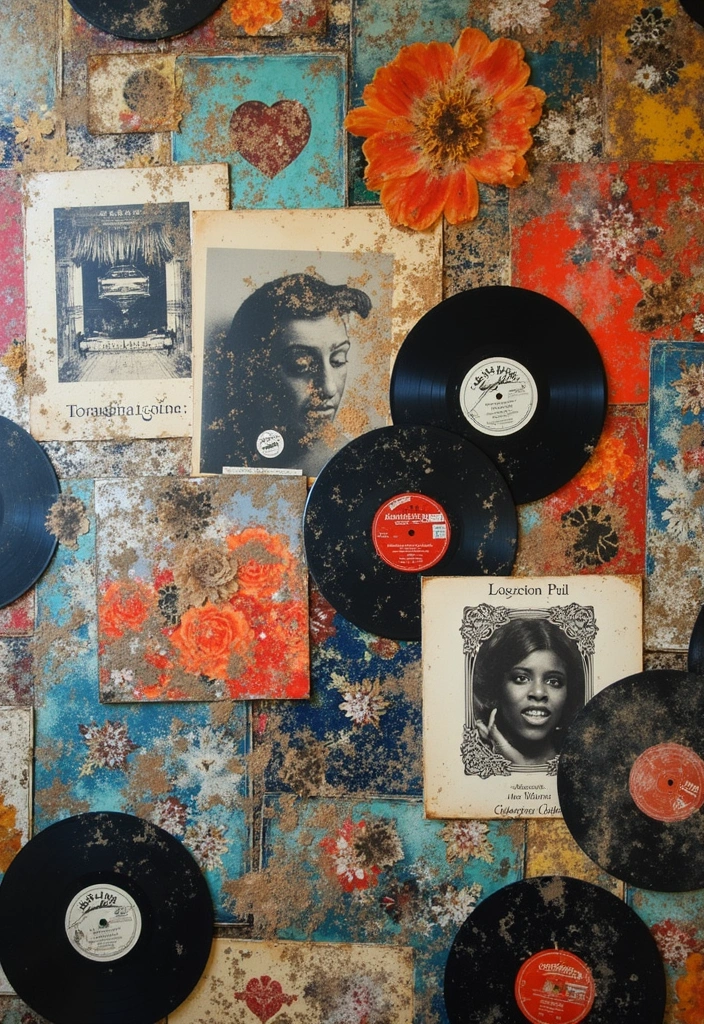
1. Vinyl Records as Wall Art
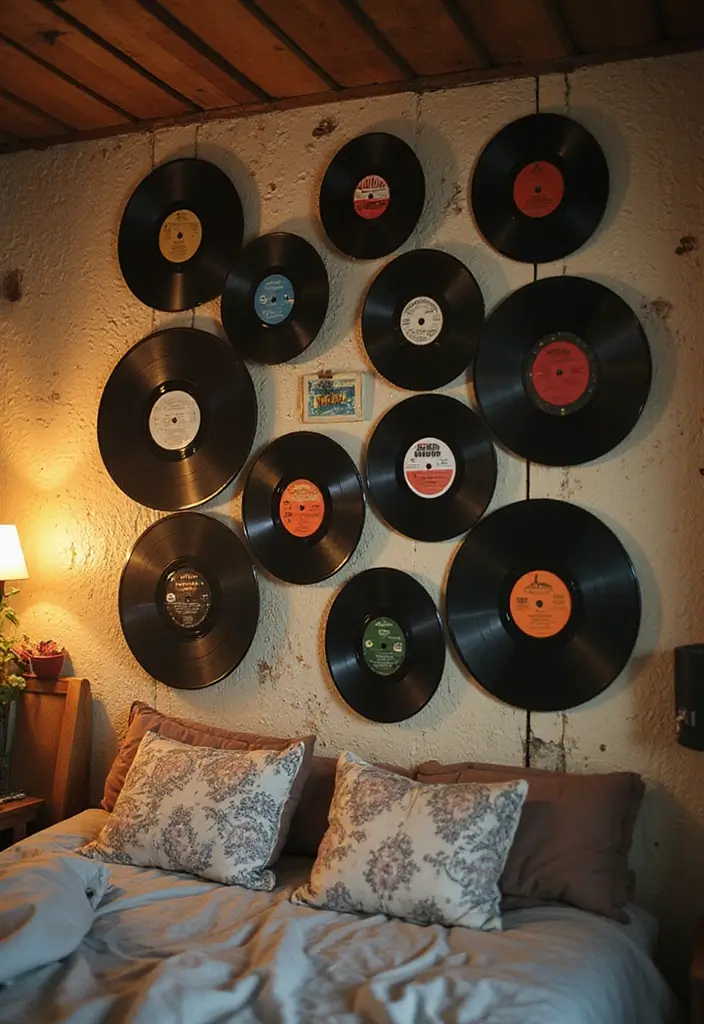
Here is why vinyl records make strong wall art. They add warm color and a soft texture. The cover art tells your music story.
Here is a simple plan you can use.
– Display method: Use plain plate hangers for a clean look, or frame each record in a shallow shadow box. Both protect the record and look tidy.
– Layout options: Pick a neat grid or a lively collage. A grid feels orderly; a collage adds energy. You can group by genre or color for cohesion.
– Placement: Put it in a cozy corner or above the bed. Jazz and blues fit a warm nook; rock or punk can star on a larger wall.
– Layering: Mix in photos or small art pieces. Vary sizes and frames for depth.
– Lighting: Add a slim LED strip along the top edge, or soft string lights. Lights make colors pop after dark.
– Maintenance: Keep records away from direct sun. Rotate a few titles every few months.
These tips keep your display fresh. With vinyl wall decor you can swap albums anytime. Start with 3 to 5 records and grow your wall over time.
Next steps: choose your space, gather hangers or boxes, mount the first album, and enjoy a wall that shows your music taste.

CLASSIC & DURABLE: With sturdy frame, high definition cover, safe packing, upsimples picture frame will protect your photo and give a clear view.

Showcase 12" LPs with eletecpro: Elevate your home music studio or living space with this sleek set of 4 vinyl record frames. While records are known as 12-inch LPs, the actual outer jackets measure up to 12.5 inches, so these frames feature a spacious 12.5x12.5 inch interior to house the entire jacket and record together while keeping your favorites visible and organized

DISPLAYS YOUR VINYL BEAUTIFULLY: Showcase your favorite LP record and album cover side-by-side in a black frame with crisp white double mat — perfect for music rooms, home studios, DJ booths, record shops, vinyl collector setups
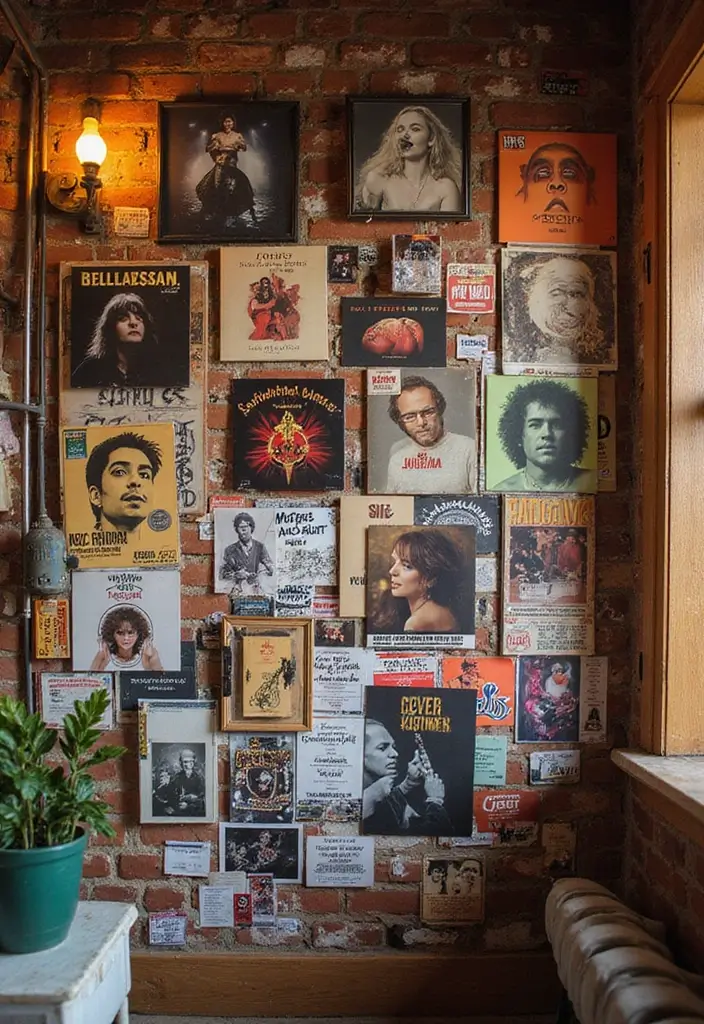
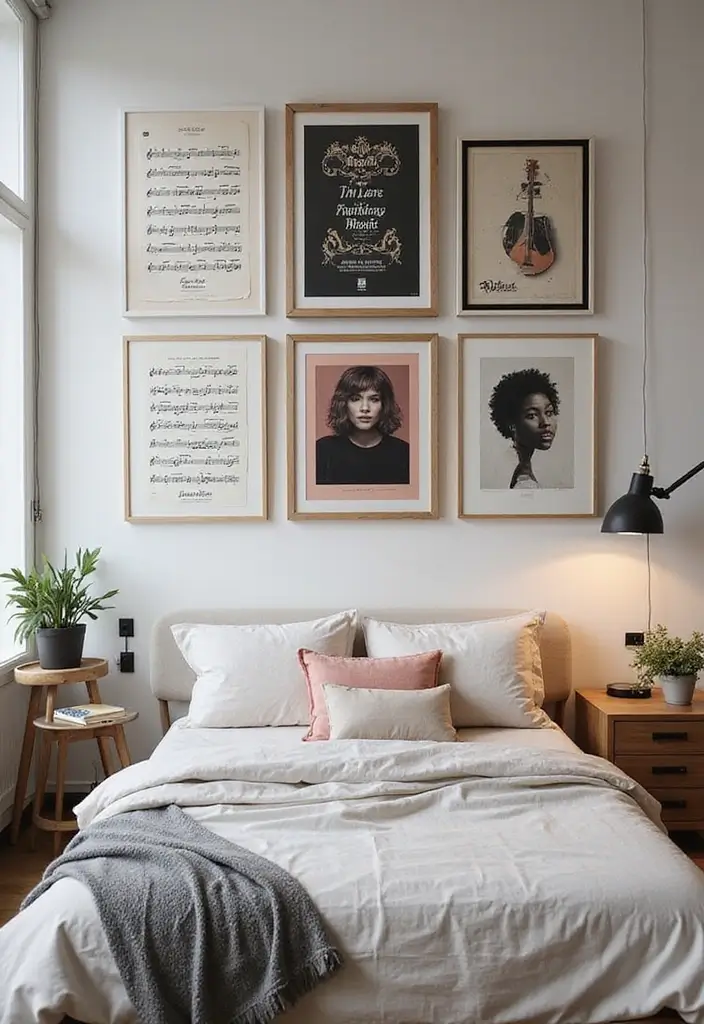
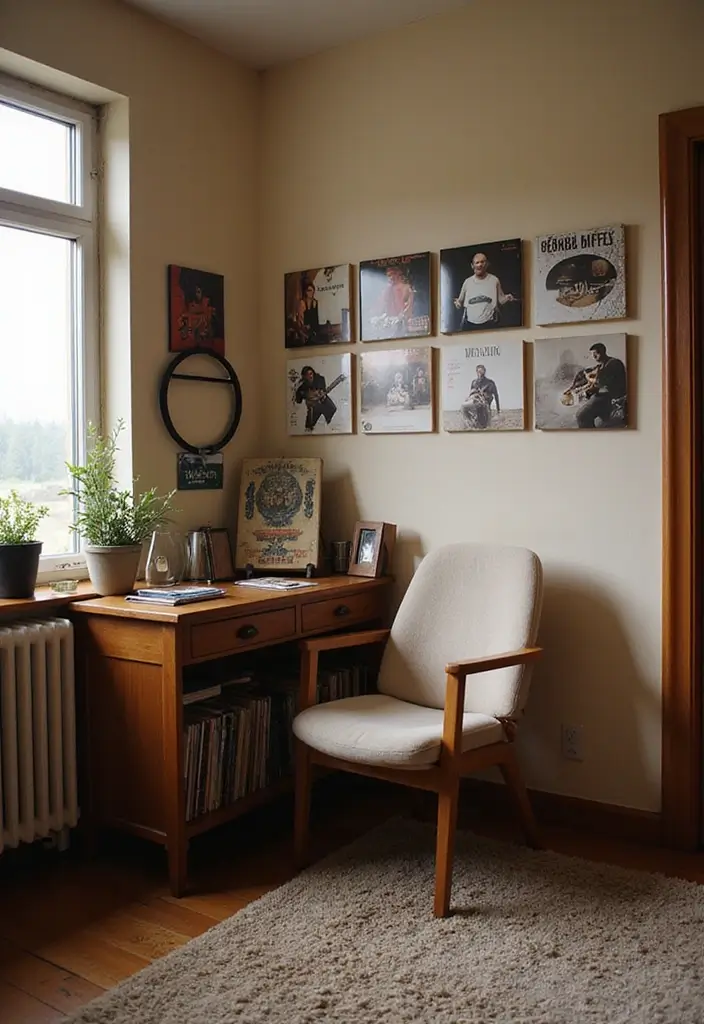
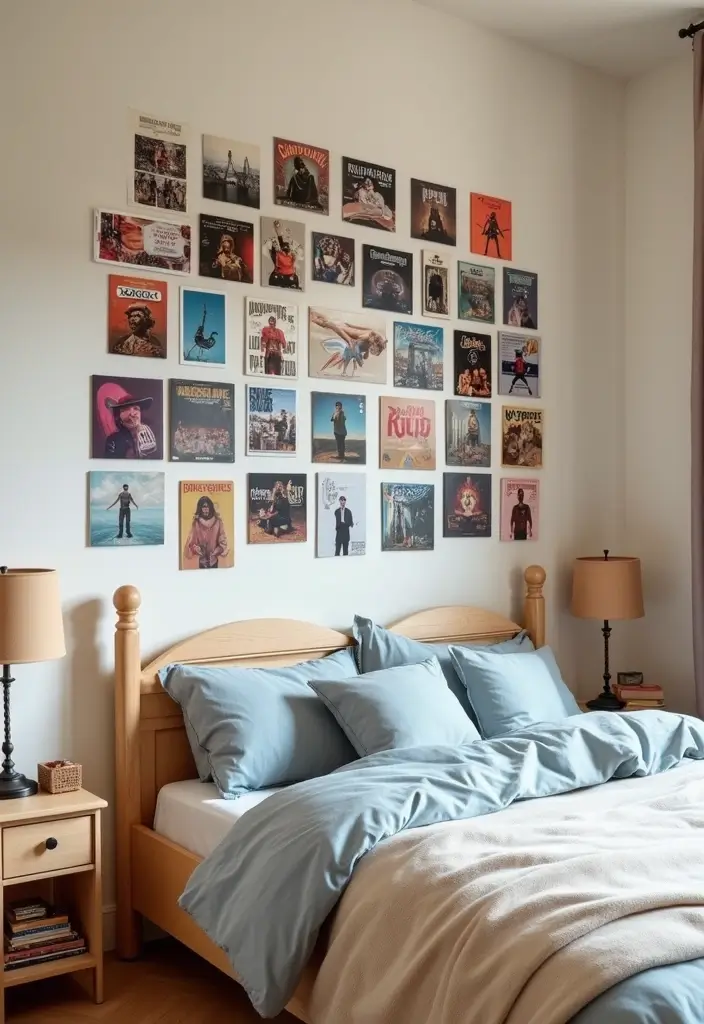
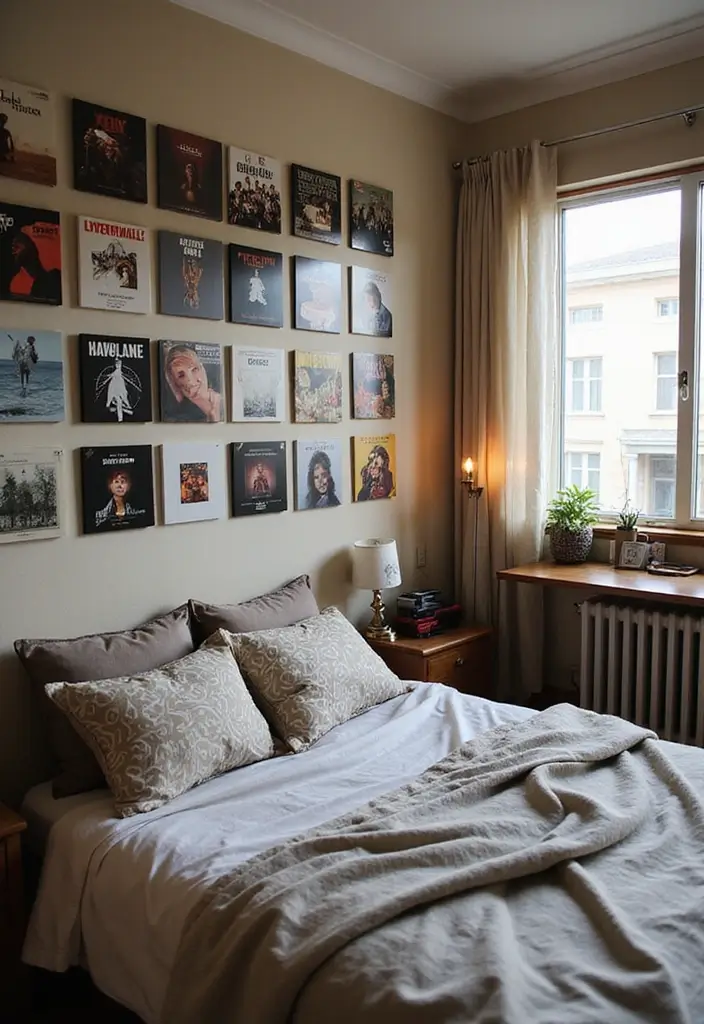
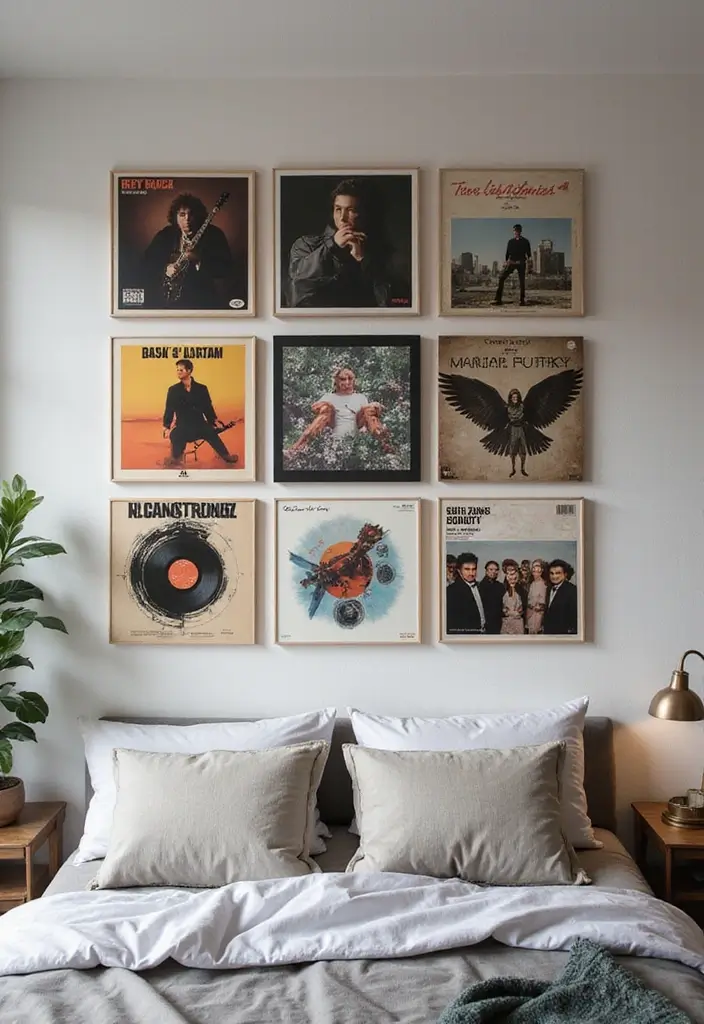
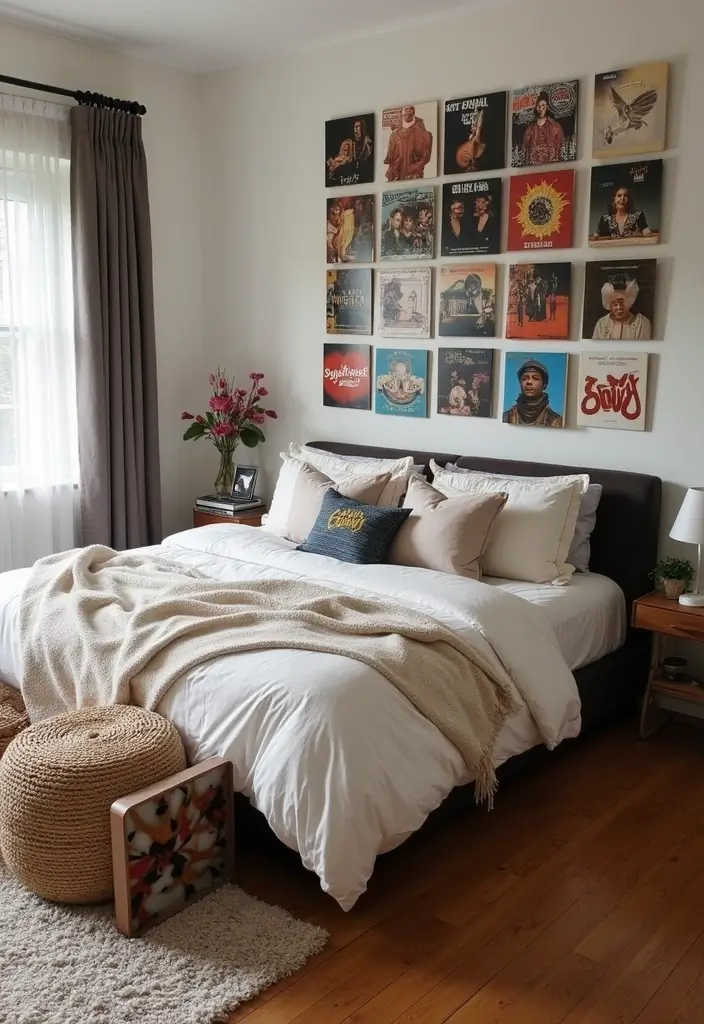
2. Framed Album Covers
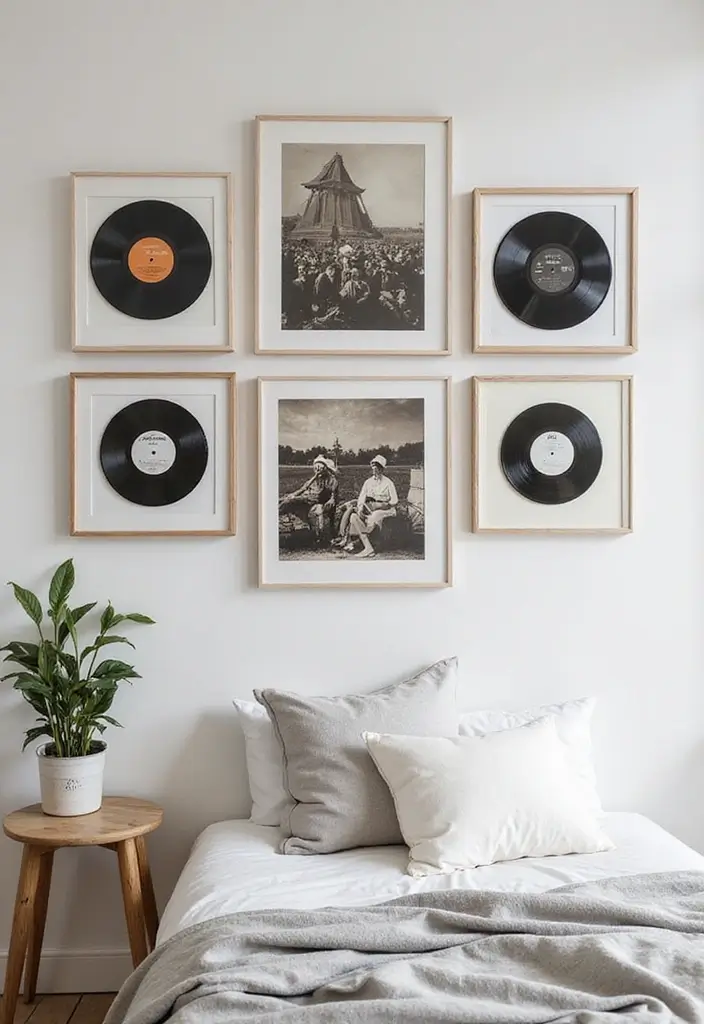
Want an easy, stylish way to show your music love on the wall? Framed album covers do the job. They bring personality without shouting. Here’s how you pull it off.
Here is why it works. Framed covers create a focal point and tell your story in a simple, readable way.
– Choose covers you truly love. Pick records that fit your vibe—classic rock, pop, indie. The more they speak to you, the stronger the wall anchor.
– Plan your frames. Use matching frames for a clean look, or mix styles for an eclectic feel.
– Display options. Try a tight grid on a blank wall, line up a shelf, or lean the frames for a casual edge.
– Add small details. A tiny plaque under each frame can share the album facts or a favorite lyric.
– Depth and texture. Shadow boxes give a 3D touch. Metallic frames add glam. Vary sizes for rhythm and interest.
– Keep it fresh. Swap out covers every few months to avoid a dull look.
Space matters. Keep frames evenly spaced and easy to read from across the room. Measure the wall, lay the plan on the floor, and adjust before you hang.
Next steps: gather the covers you want, pick your frames, and test layouts on the floor. Then hang with a level so the wall feels calm and complete.
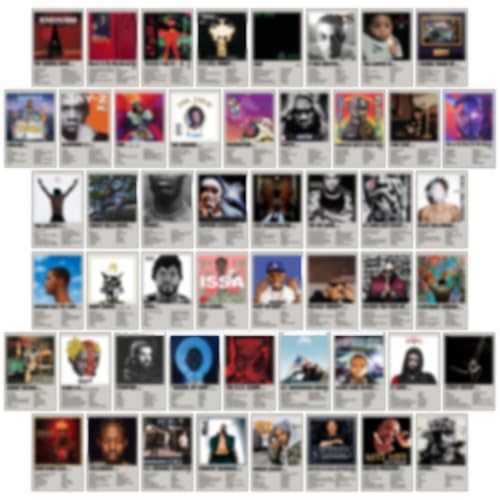
Package including 50pcs rap theme album cover collage kit featuring iconic hip-hop theme music posters in 4x6 inch prints, designed to create a bold, music-inspired wall display.

1. A Set Of 100 Album Pictures For Wall Decor. The Room Decor Album Cover Photos Have A Matte Finish. Each Photos Is 5x5 Square Print And Comes In A Protective Box.

Size : 5 size for choice(1 inch=2.54cm)
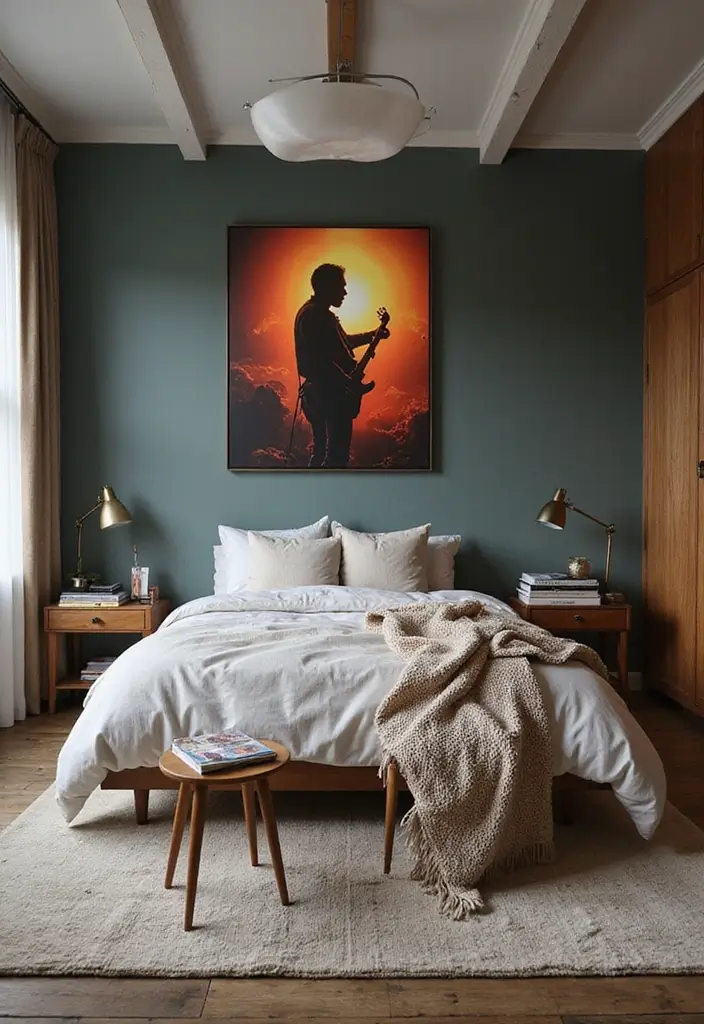
3. Wall Mural of Your Favorite Artists
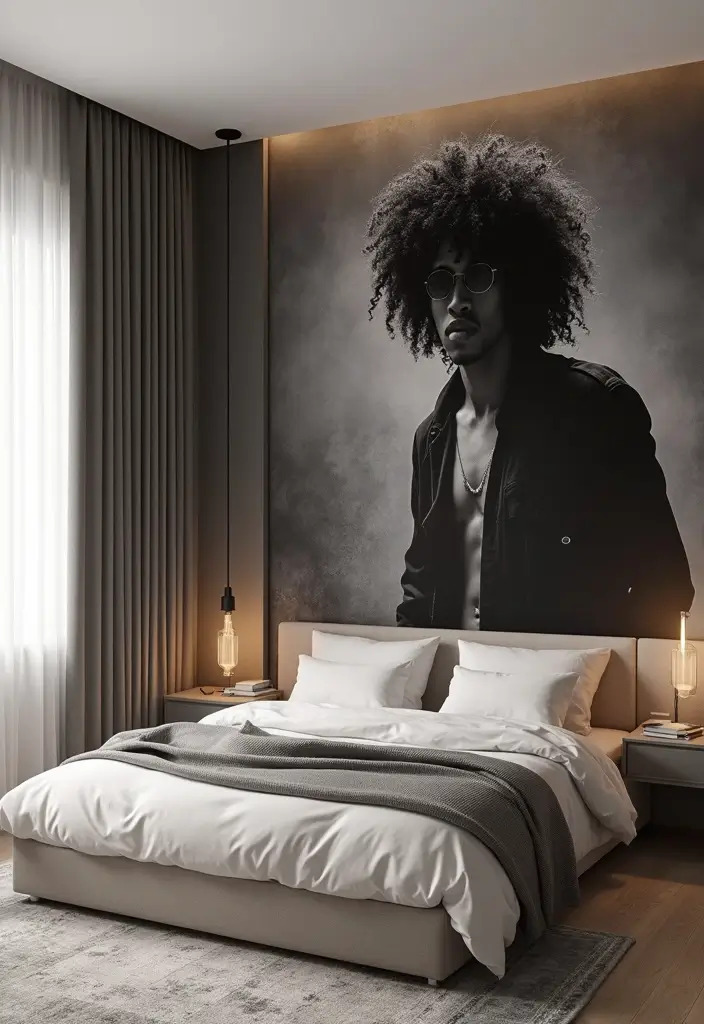
If you crave a bold music vibe in your bedroom, a wall mural can do the trick. It features your favorite artist or album art to tell your style at a glance. You can hire a mural artist for a custom scene, or opt for removable wallpaper with album art. A full wall creates a dramatic focal point and invites you to slip into your own musical escape.
You want a look that feels powerful without overwhelming the room. A mural works best when the rest of the space stays simple. Light, neutral furniture and soft, muted colors let the art take the lead. Test the mood with warm lighting, too; a cozy glow makes colors feel alive.
– Choose a method that fits your budget by weighing prints versus a painted wall.
– Pick a wall that naturally draws the eye to make the mural a true centerpiece.
– Pair the mural with complementary decor like musical instruments, quotes from the artist, or simple shelves.
– Use contrasting colors to add depth and keep the focal point vibrant.
Next steps are practical and simple. Measure the wall area and plan the mural size with care. If you go with wallpaper, choose a removal-friendly option to protect your paint. For a painting, hire a professional to ensure clean lines and even color. Finish with soft accessories and you’re ready to enjoy your music room.

Structure: A 0.25-inch thick foam backing board, covered in white linen fabric, seamlessly complements your artwork. Utilize the included push pins to create a delightful display

【High-end wooden display case, anti-fading matte black】Military Uniform Shadow Box is made of high-quality wood with anti-fading matte black finish, which is sturdy and durable, and enhances the display grade of Uniform Display.

Elevate your memories with a display that’s anything but ordinary. Featuring a classic black finish and soft felt back, this shadowbox picture frame showcases your photos, awards, or keepsakes with elegance and protection.
4. Clipboards for Rotating Displays
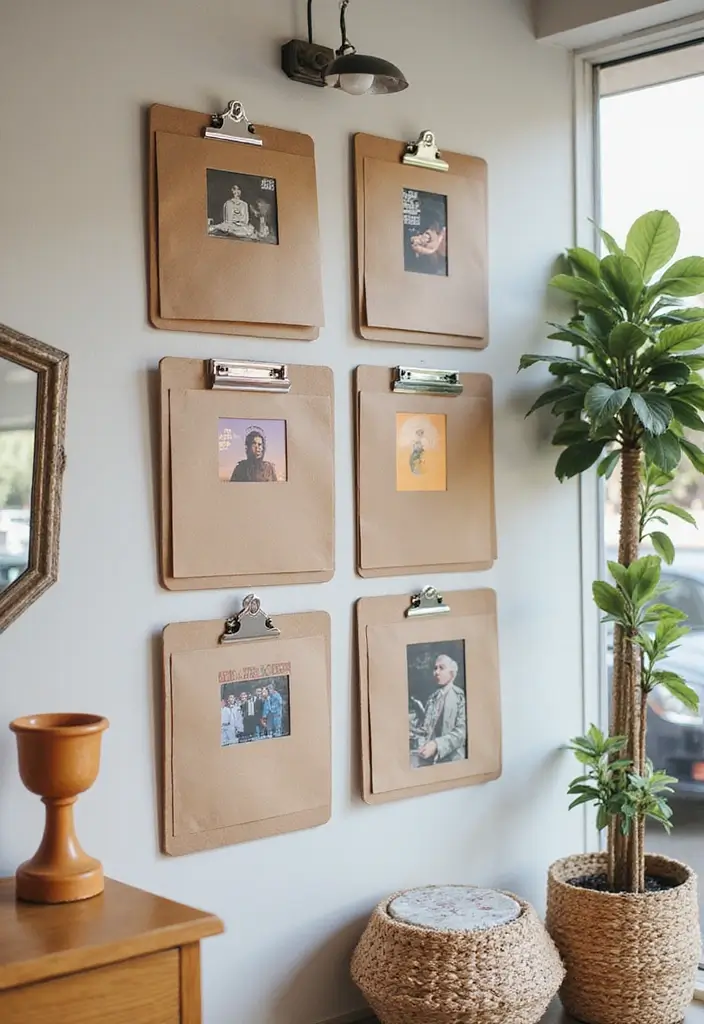
Want an easy way to show album art on your wall and swap it out often? Clipboards make a fun, simple display that feels personal. You can go colorful or keep it clean and minimal.
– Choose bright clipboards to add a pop of color. The colors catch the eye and set the room’s vibe.
– Mix album covers with your own printed art for variety. A favorite band next to a small print keeps things fresh.
– Hang them at different heights for an artful rhythm. Varying levels keeps the eye moving.
– Add fairy lights or tiny plants around the boards for extra charm. Soft light or a touch of green makes the art glow.
– Keep a simple label on each board to track rotations or a monthly theme. It makes swapping pieces quick and easy.
Here’s how to set it up
Let’s break it down.
– Pick a wall or a nook that’s easy to reach.
– Gather 4 to 8 clipboards and the albums you want to display.
– Mount firmly with nails, hooks, or strong adhesive strips depending on the wall.
– Arrange on the floor first, then move to the wall. Clip your albums so you can swap later.
Next steps
– Rotate weekly with new finds you love.
– Keep a spare board for special themes like new releases.
– Wipe the boards after swapping to keep prints looking clean.
This approach stays flexible, budget-friendly, and ready for your next music mood.
Transform your space with album cover wall decor bedroom ideas! Clipboards let you easily swap your favorite art, keeping the vibe fresh and personal. Get creative and let your music style shine!

Smart RGBIC Effects: RGBIC LED Strip lights for bedroom display multiple colors on one line at a time compared with traditional RGB lights. A colorful combination of LED strip lighting for bedroom brings a strong visual impact. (Not Support Alexa)
Bright: With 20 feet 360 high quality LEDs and a 6500K color temperature, white led strip lights help you light up those dark rooms, cabinets, mirrors and corners(Notice :Please unroll the entire light strip before lighting up)

Smart RGBIC Effects: RGBIC LED strip lights for bedroom display multiple colors on one line at a time compared with traditional RGB lights. A colorful combination of LED strip lighting for bedroom brings a strong visual impact. (Not Support Alexa)
5. Album Art Shelves
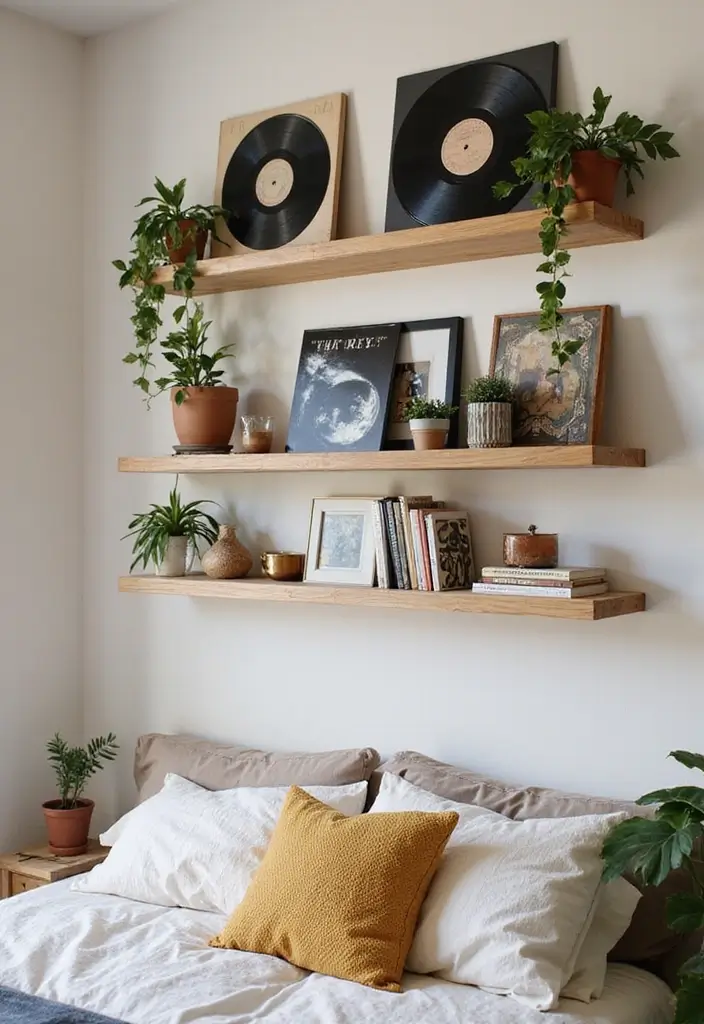
Need a simple way to show your music vibe in your bedroom? Album art shelves offer a clean display. They let your best album covers stand out while the room stays calm.
Start with one wall and a pair of deep shelves. Put a few records up front, then tuck plants or photos behind. This layered look adds depth.
– Deep shelves fit large items.
– Use 2–3 colors and repeat them for a cohesive feel.
– Try layouts. Start straight, then mix heights and angles.
– Add a small spotlight or LED strip above to highlight the display.
Ready to set up? Here’s how: 1) pick a light spot 2) mount sturdy shelves 3) arrange a main row of records and supporting items 4) switch pieces as you go.
With album art shelves, you keep your music vibe front and center without clutter. It’s easy to update as you discover new records. Want more impact? Mix materials. Metal frames with wood shelves give a modern feel; white shelves fit most rooms. Add a few small books or black-and-white photos to tie it together. Before you drill, snap a quick photo and plan the layout on the floor. Move pieces until you feel the rhythm. Then hang them.
Transform your bedroom into a music haven! With album art shelves, you can showcase your favorite records while keeping your space stylish and serene.

Capture Your Memories: From the faces of your loved ones to great times with friends and family get-togethers, this collage photo frame lets you display an array of wonderful moments. It features 12 frames, each perfectly sized for 4x6 photos
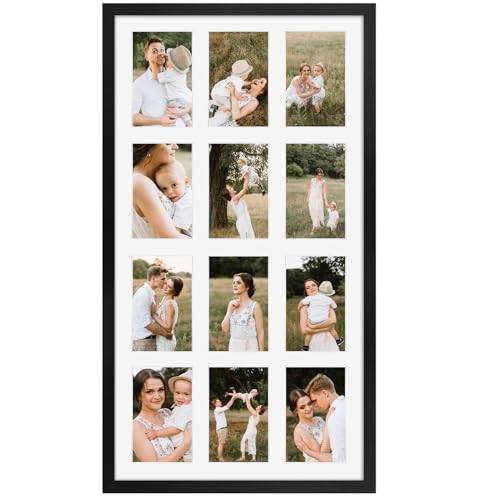
12 OPENING COLLAGE PICTURE FRAME: This matte black collage frame is designed to display 4x6 photos. The package includes two-sided tapes to prevent photos from sliding. Kindly remember to remove the protective film on both sides of the PS front before use.
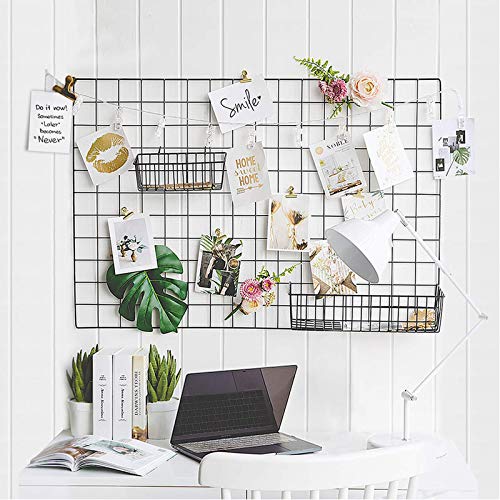
Quantity: 2 pack Grid Wall Panels, 1 set String Light, 10 pieces Colorful Clips, 20 pieces Natural Wooden Clothespins, 4 pieces Adhesive Hooks, 4 pieces No-Trace Hooks, 1 set Jute Twine. Many accessories, ideal for DIY Décor
6. Collage of Music Moments
Here is why a collage of music moments works on a wall you see every day.
– Begin with album covers that hold meaning to you, not just looks. Pick ones tied to concerts, road trips, or special nights.
– Add items that tell more of your story, like concert tickets, printed photos, and short handwritten notes.
– Mix shapes and sizes. A varied layout guides the eye and keeps the display interesting.
– Try colorful backgrounds behind the covers. A soft teal, warm peach, or muted gray can make the art stand out.
– Include a few words or quotes that fit your vibe. Short phrases give a personal voice to the wall.
– Frame the whole collage for a neat, finished feel. A simple frame pulls everything together.
Next steps to plan and install.
– Lay the pieces on the floor first. Move them until the flow feels right.
– Choose a base: foam board, corkboard, or a lightweight frame backing.
– Measure the wall space and mark key spots with painter’s tape. This helps you line up evenly.
– Attach items with safe backing or removable adhesive so you can rotate later.
– Dust the wall and refresh the setup every few months to keep it lively.

❶ VINYL RECORD FRAME✔ ➤12.5 x 12.5 frame is designed for displaying 12 inch LP Record with album cover.

Classic Design: 12.5 x 12.5 frame is designed for displaying 12 inch record with album cover. Can not fit the vinyl album with a spine.

【Acrylic Record Holder】 Invisible appearance is specially designed for displaying your favorite vinyl records like floating in the air without detracting from them. You can easily find and change the albums.This vinyl shelf is a perfect gift for music lovers and vinyl collectors.
7. Music Notes and Art
Want your bedroom to show your music love without shouting it out loud? Music notes and album art can do the job. This approach blends favorite album covers with simple symbols, notes, and instruments for a cohesive vibe.
– Centerpiece that blends art and music. Pick a striking piece to anchor the wall. Frame a favorite album cover and add subtle notes or a tiny instrument on the edge.
– DIY art ideas. Create prints that mix sheet music patterns with your top albums. You can paint simple notes on a canvas to echo songs you love.
– Mix in real album covers. Put a few album covers next to the DIY art. Keep sizes varied so the wall feels balanced, not crowded.
– Frames and gallery layout. Choose frames that match your room style. A tight grid brings order; a salon wall adds a casual, artsy charm.
– Color and texture. Pick colors that tie to your decor. Try canvas prints for a textured, gallery finish.
– Placement and lighting. Hang pieces at eye level for easy viewing. Add a warm light or a string of fairy lights to softly highlight the art.
– Keep it fresh. Rotate pieces every few months. Swap in new notes or instrument accents to reflect your growing music taste.
Transform your bedroom into a harmonious blend of art and music! A few well-placed album covers and subtle notes can create a space that sings without screaming your style.

CUSTOM ALBUM COVER POSTER - With different sizes from 8x10" to 24x36" transform your space with our unique personalized framed album cover poster prints. Designed with the iconic polaroid style, these custom album posters feature your favorite singer and album names. Our vivid and eye-catching printing ensures every detail is brought to life, making these posters a must-have for music enthusiasts.

Complete Wall Collage Kit: Set includes 60 pieces of 4x6 inch music-themed posters featuring diverse album covers, rappers, and band artwork perfect for creating a personalized wall display

8. Vintage Record Player Showcase
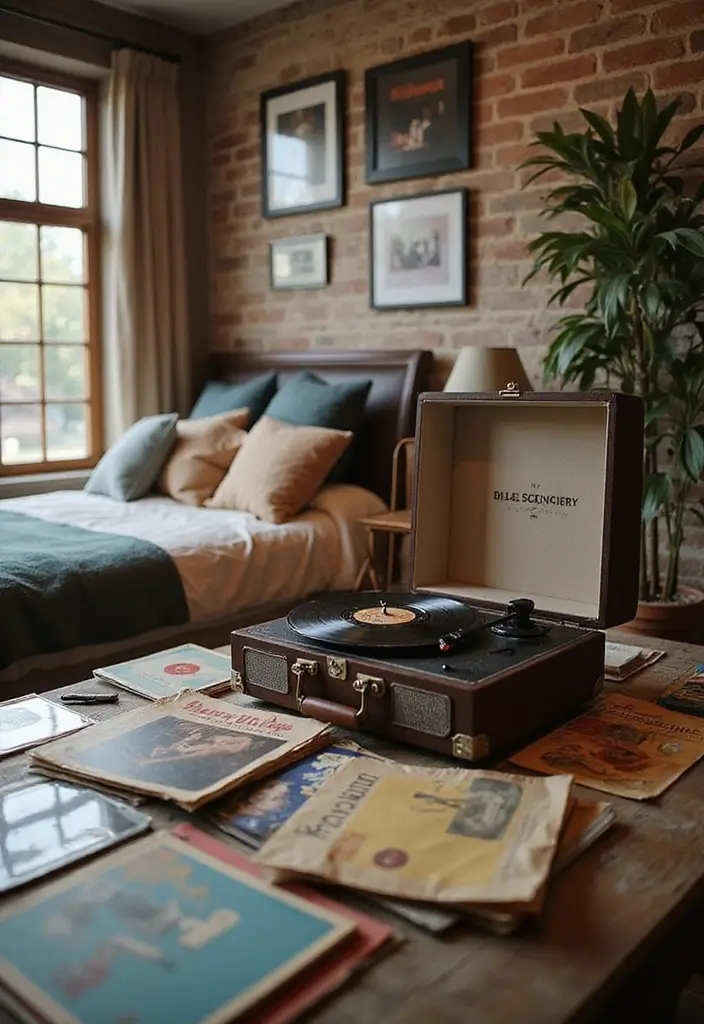
You want your space to show your love of music. A vintage record player can lead the way. It becomes a focal point and an invitation to spin a favorite tune.
– Place the player on a sturdy stand or cabinet.
– Surround it with your best album art.
– Put some on shelves or hang a few on the wall.
– Keep it easy to use.
– Put a ready-to-play record on the turntable and keep extra sleeves within reach.
– Add life with plants near the setup.
– A touch of green makes it feel warm.
– Create a comfy corner with a chair.
– A place for quick listening.
– Add a small side table for records.
– Finish the look with a wood tone that matches your floor or a metal frame for a retro feel.
– Light the spot with a small lamp or warm string lights.
– Keep dust down by wiping the player and records with a soft cloth.
Choose a style that fits your room.
Wood tones, metals, and album art should feel connected.
This keeps the room balanced.
It makes the scene feel personal.
Finish with a small lamp to highlight the art and wood. Keep cords tidy and dust away so your display stays inviting.
9. DIY Decoupage Album Art
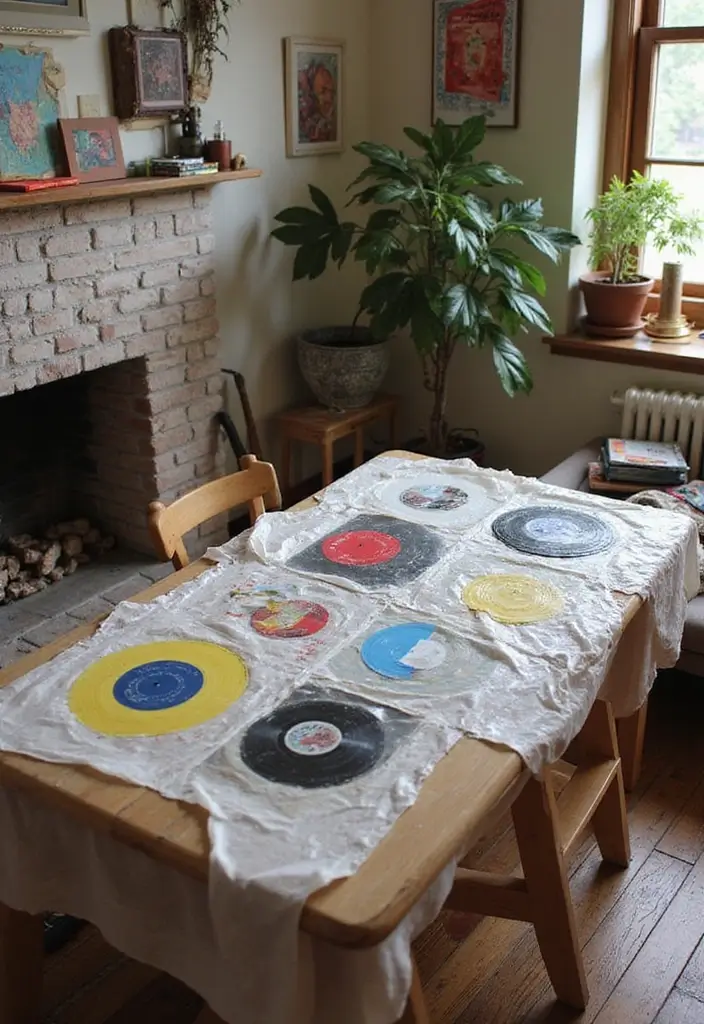
Are you after a wall or a piece of furniture that shows your music taste? DIY decoupage album art lets you turn cut outs from album covers into fresh decor you can actually use. It adds texture, color, and a vibe that only your playlists can match.
What you’ll need
– A clear surface: a dresser top, a side table, or a canvas piece
– Album covers or printed images you love
– Decoupage glue or PVA glue and water
– A foam brush or small sponge
– Scissors or a craft knife
– A sealing coat: spray sealant or brush-on varnish
– Optional: sandpaper for smooth edges
How to do it
1) Prep the surface. Wipe it clean and dry well. A smooth base helps the art stick long.
2) Plan your layout. Lay out the pieces without glue. Try a simple repeat or a bold collage.
3) Glue the art down. Put a light coat of glue on the back of each piece and press it flat. Work from the center out to chase air bubbles.
4) Seal the piece. After the glue dries, apply one or two coats of sealant for protection. Let each coat dry fully.
5) Finish and display. If you’re doing a table, you can top coat for wear. Hang a panel on the wall with strips or mount in a frame.
Tips to make it pop
– Mix small and large pieces for depth.
– Trim edges for a clean look.
– Use a plain back or a soft color under the cutouts to help the images stand out.
– Choose finishes that fit your room (gloss for bright rooms, matte for calm spaces).
Common questions
– Will it last on furniture? Yes, with a proper seal and a stable surface.
– What glue is best? Decoupage glue or PVA glue works well.
– Can I cut photos from vinyl records? Yes, just handle them gently and trim edges clean.
This approach keeps your decor personal, affordable, and easy to change as your music taste shifts.
10. Hanging Album Covers

If you want a quick, stylish music vibe without taking up floor space, hanging album covers is for you. It creates a playful halo of color and texture above your bed or couch. Here is how to pull it off with ease and safety.
– Choose lightweight covers. Skip heavy framed vinyl art. Thin, paper-backed or lighter sleeves are easier to suspend and safer for ceilings and walls.
– Plan a layout. You can run a straight line, scatter the covers in a loose constellation, or build a simple grid. A thoughtful pattern draws the eye and keeps the room feeling balanced.
– Use safe hanging methods. Clear fishing line or thin wire works well. Attach securely with ceiling hooks or sturdy picture hooks. Test each piece gently before inviting people to pass underneath.
– Add other hanging accents. A string of fairy lights or soft paper lanterns can weave through the covers. The glow adds warmth and a touch of whimsy.
– Rotate with the seasons. Swap in new covers or re-arrange for a fresh look. This keeps your space feeling current and personal.
– Coordinate with textiles. Tie the colors to your bedding or curtains for a cohesive vibe. A simple palette tie-in makes the display feel intentional.
– Care and maintenance. Dust gently with a soft cloth. Check the strings every few weeks to keep things secure and neat.
Next steps: gather a handful of light covers, pick a layout, and start small. You’ll gain color, character, and a true display of your music style.
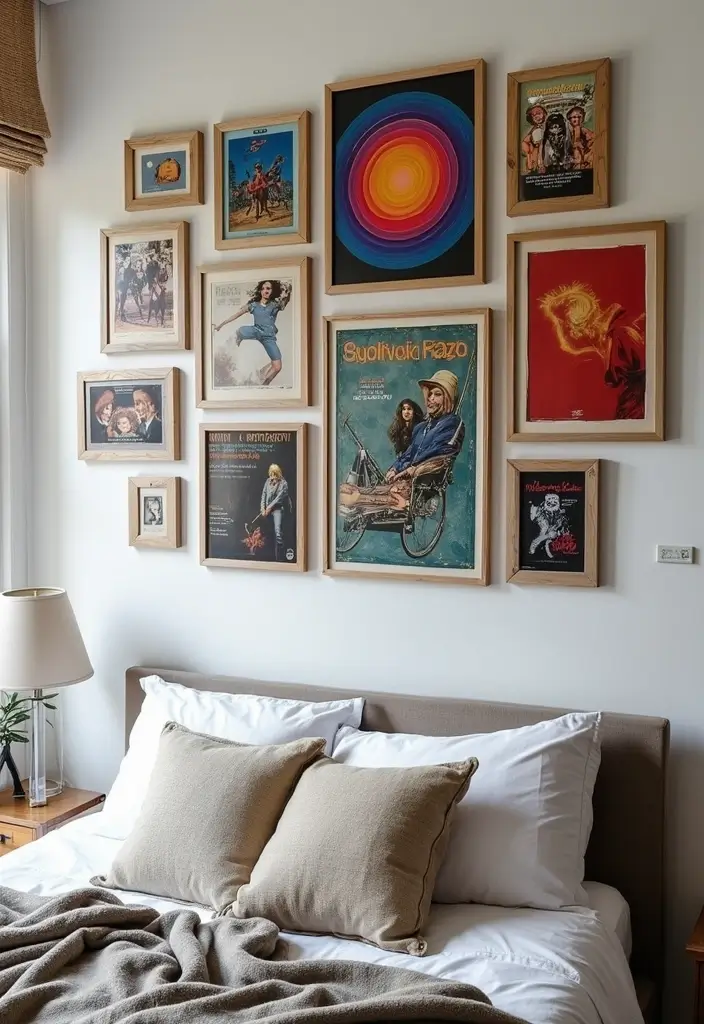
11. Music Collage Frame
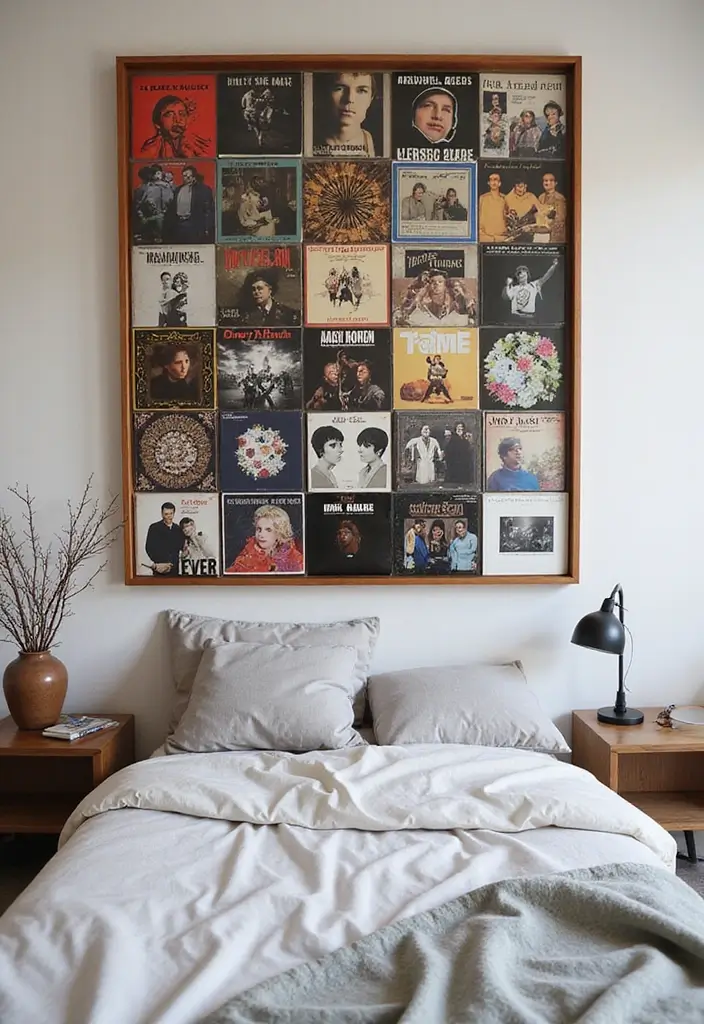
If you want a bold focal point that shares your music taste, a music collage frame is your answer.
Choose a large frame with several slots for album covers wall decor.
Fill the slots with album covers you love. The result is a single art piece that tells your story.
– Theme for harmony: pick a color scheme or a genre mix.
This makes the collage feel intentional.
– Vary the layout: mix horizontal and vertical covers to add movement.
This keeps the art lively.
– Placement matters: hang it above your bed or at the end of your desk for a strong focal point.
This gives you a steady, eye catching display.
– Finish with small touches: add a few tiny plants or slim decorative items nearby to frame the collage.
These small details enrich the look.
How to assemble in practical steps:
– Gather 6 to 12 covers or print high quality copies. Aim for a consistent size so the grid looks neat.
– Lay the plan on the floor. Try a grid or a diagonal sweep to keep it lively.
– Use a neutral backing or mat so the art pops.
– Secure the covers with simple mounting corners or photo safe tape.
– Hang with a level and measure the space before drilling.
Maintenance and quick tweaks:
– Rotate one or two covers every season to keep it fresh.
– Swap in a new cover that matches your current music taste.
– Keep the frame dust free for a crisp look.
12. Themed Music Corner
Want a simple way to show your music style in your room? Try a themed music corner. This spot blends wall art with cozy seating. It stays easy to modify as your taste changes. It fits small rooms and stays easy to rearrange. You can change the look later.
– Cozy seating and album shelves Set a comfy chair or bean bag with nearby album shelves to invite you to sit, read liner notes, and listen.
– Warm lighting Add a soft lamp or string lights for a gentle glow.
– Showcase album art Hang a few covers above the chair to greet you as you start.
– Define the zone with a rug A small rug marks this spot as its own corner and helps you feel it under your feet.
– Side table for small treats Keep a compact table for drinks and snacks nearby.
– Music themed accents Add a vinyl clock or cushions that fit your style.
– Easy access to music Keep a ready playlist or leave albums within reach.
– Keep it calm and tidy Limit clutter by rotating keepsakes and keeping shelves neat.
– Make it your sanctuary This corner invites creativity and rest while showing your music vibe.
– Display in frames Frame a few covers in light frames to protect them and keep colors bright.
– Use a color theme Pick a color for the rug and cushions that matches your album art.
Next steps: set up this space this weekend, then relax and enjoy.
13. Album Art Postcards
Looking for a quick way to show your music vibe in your bedroom? Album art postcards can do it. They’re affordable, easy to swap, and add color without overhauling your space. Think of it as a mini gallery wall for your album covers. You get a wall that feels personal and unique.
What you need
– A batch of album art postcards printed from your favorite albums or saved images.
– A display option you like: frames sized 4×6 or 5×7, a small picture ledge, wooden clips on a string, or a magnetic strip.
– Optional: a UV-protected finish or glass to limit glare and fading.
How to set it up
– Pick one postcard size for a clean, steady look.
– Group your cards by artist or by genre for easy rhythm.
– Mix horizontal and vertical layouts to keep the wall lively.
– Use clips, strings, or binder clips so you can swap designs in seconds.
Next steps: choose a spot, measure space, and start with a starter grid or a free‑form wall. Begin in a corner above the bed or a hallway nook.
Tips for care and rotation
– Rotate designs every few weeks to keep the wall fresh and interesting.
– If sun hits the cards, frame them or place the set under a UV‑protective cover.
14. Wall-mounted Vinyl Storage
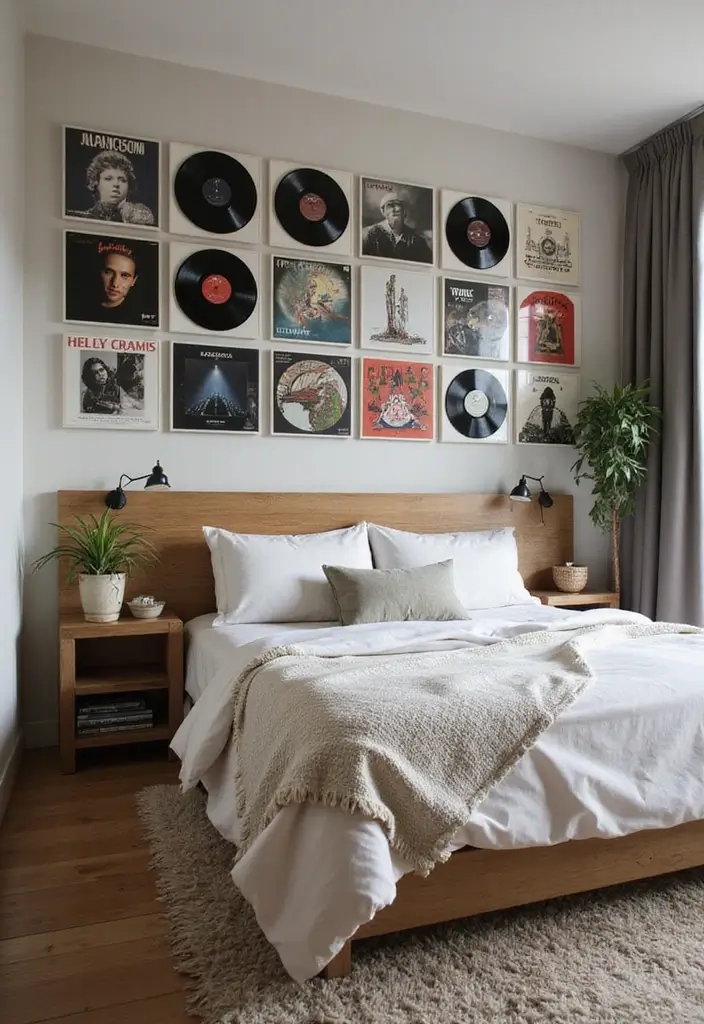
Wall-mounted Vinyl Storage That Doubles as Decor
You want a tidy room that shows your music taste. Wall-mounted vinyl storage can do two jobs. It keeps your records organized. It also turns covers into wall art.
Here is why this setup works. It keeps your collection in sight. You can pick a record fast. It adds texture to the room and gives it character.
Next, pick a design that fits your space. You have options. Slim floating shelves give a clean look. Modular panels let you grow with your collection. Custom mounts frame your top albums.
Choose materials that match your style. Natural wood adds warmth. Matte metal gives a modern edge. A bold color can act as a wall accent.
Place the display near your turntable for quick grabs. If you like a rhythm of color, group spines by hue or by artist. Leave a little space around each cover so it can shine.
Set it up with care. Measure the wall first. Choose sturdy anchors. Level the units as you install. Start with a small group of albums, then add more.
To finish the look, add a few music items like compact speakers or a tiny instrument. A soft light can highlight covers at night. Rotate the display every few months to keep it fresh.
Next steps:
– Measure and plan
– Install with proper anchors
– Arrange by color or artist
– Refresh periodically
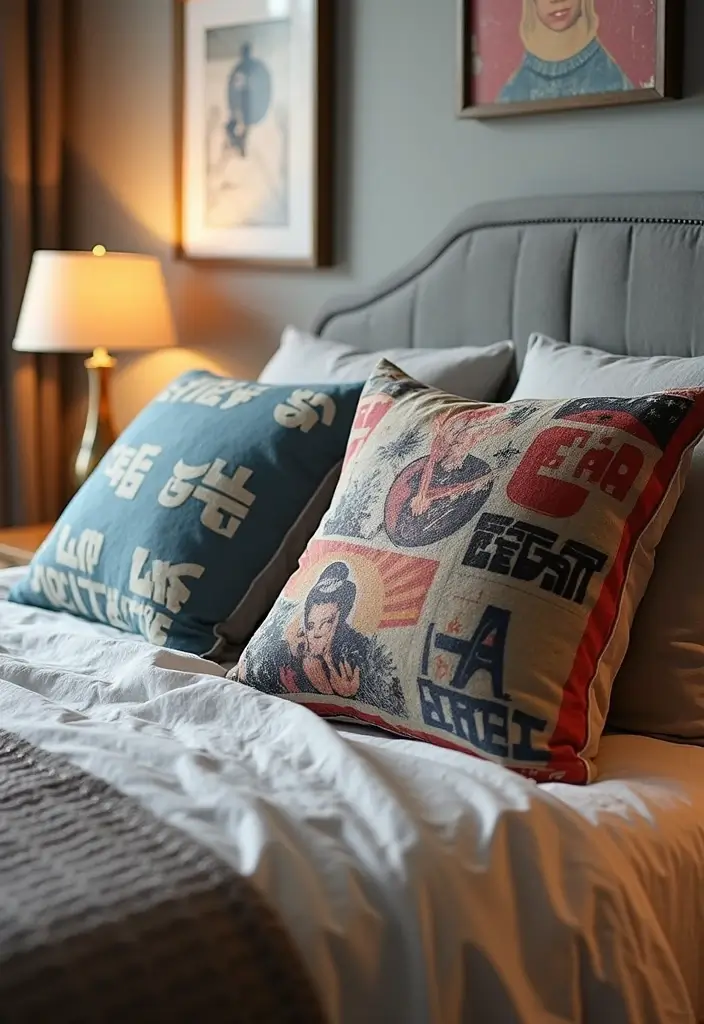
15. Album Inspired Textiles
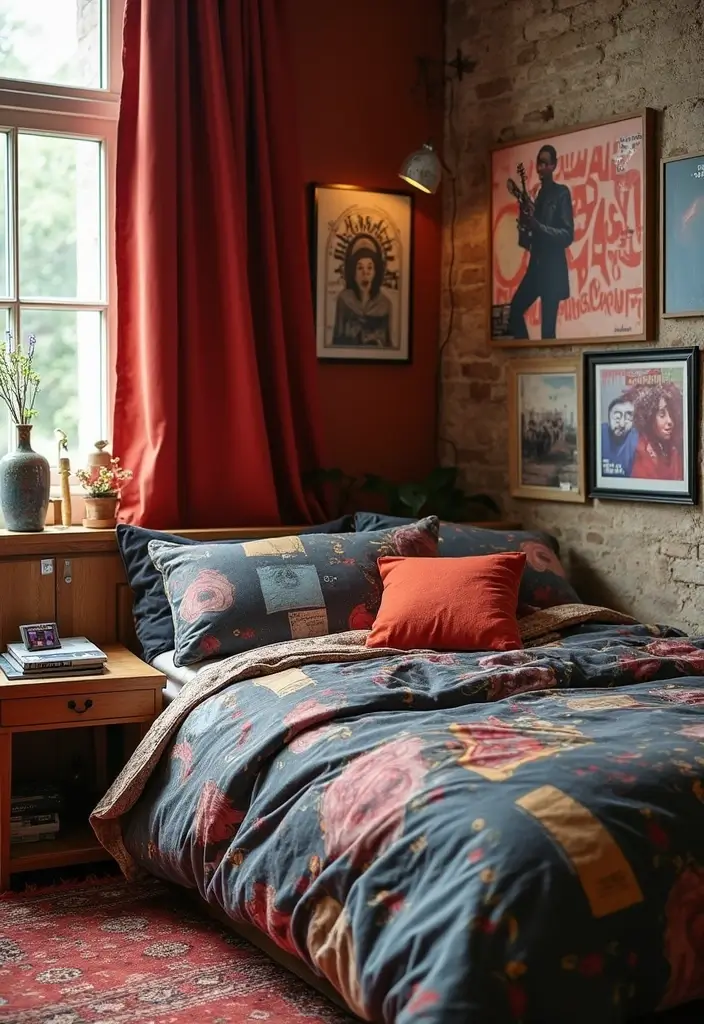
Your space can wear your favorite music. Album inspired textiles let you show off your taste on bedding, curtains, and wall decor. Textiles inspired by album art give you color, mood, and a personal touch.
– Step 1: Pick the vibe Look at the album cover and note the colors and mood. Decide if you want bold pops or soft tones.
– Step 2: Choose fabrics Here is why fabrics matter. Choose easy care materials like cotton, linen, or a soft knit. Look for fabrics that wash well in a home machine.
– Step 3: Build a small palette Pick two or three main colors. Add a fresh accent that pops against the rest.
– Step 4: Choose textile pieces Start with a duvet cover or throw. Add curtains and wall hangings to echo the art.
– Step 5: Mix textures Layer smooth cotton with ribbed knits or velvet. Texture adds depth and comfort.
– Step 6: Pick subtle patterns Favor muted prints, gradients, or abstract shapes. Let the album art guide the color, not the busy pattern.
– Step 7: Tie it together with cushions Use cushions that echo the main art. Rearrange until you feel balanced.
– Step 8: Plan care and longevity Check labels. Choose fabrics that stay nice after washing and frequent use.
– Step 9: Placement ideas Let a bold curtain frame the window. Hang a wall textile near the headboard for focus.
– Step 10: Quick start plan Buy two pieces first. Add one item per month as you refine the look.
Next steps: start with two pieces, then add one item each month as you refine the vibe.
16. Retro Suitcase Display
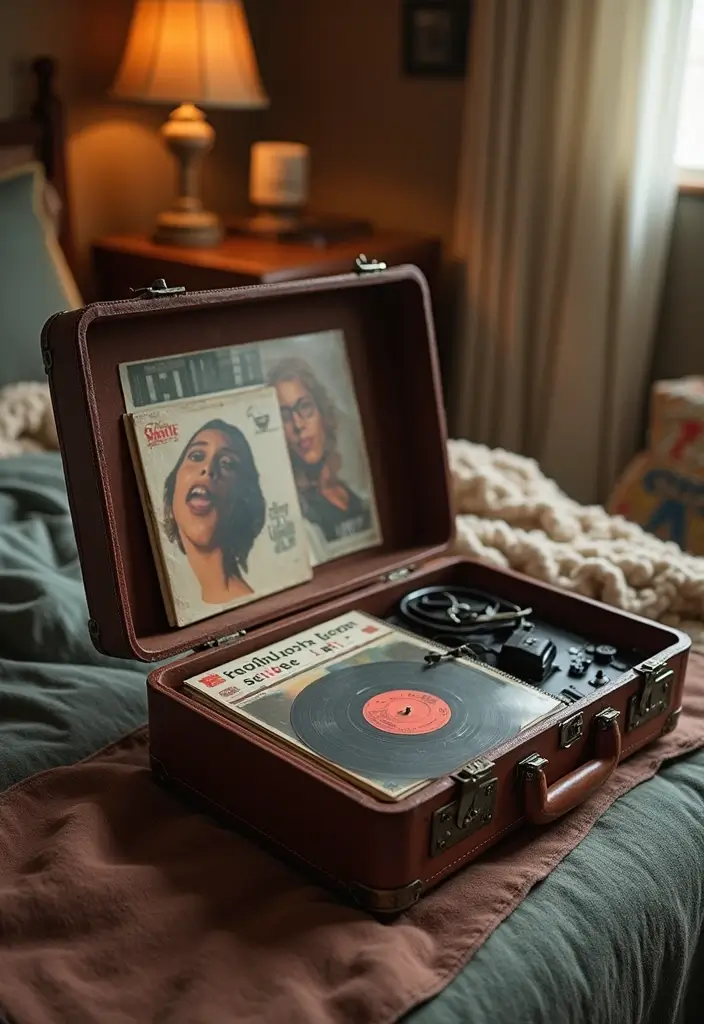
You want a stylish, simple way to show your album art without clutter. A retro suitcase display gives charm and a music vibe. It blends old school style with tidy, modern shelves.
– Choose a suitcase that fits your space Pick a size that sits on a nightstand or shelf. Match the color to your room and avoid clashing patterns.
– Decide how to show the art Open the lid to reveal covers, or keep it closed for a clean line. Open shows texture, closed feels calm.
– Add a warm glow Wrap a short string of lights around the rim. The glow helps colors pop and adds warmth.
– Fill with favorites Place 6 to 10 album covers inside. Face outward for a bold display, or group by color for a mini gallery.
– Use it for next spins Store the records you will spin soon inside. Close the lid after spinning for a neat look.
– Pair with vintage finds Add a small lamp, postcard, or stand. This mix creates a cozy, eclectic corner.
– Care tips Dust weekly with a soft cloth. Check hinges and keep the lid dry.
Ready to try? Place it on your nightstand and swap art anytime.
17. Music-themed Wall Stickers
Music-themed Wall Stickers: Easy, Playful Decor
Here is why these stickers fit your space. They bring your love of music to the wall without permanent changes. They are simple to apply and remove, so you can swap them as your style changes.
What you can choose
– Musical notes, instrument shapes, sound waves, and abstract art inspired by album covers.
– Small accents or larger panels to fit any wall size.
– A mix of bold and subtle pieces for a layered look.
How to arrange them
– Start with a light base near your album covers to tie the space together.
– Layer different shapes and sizes for depth without crowding.
– Pick colors that match your room so the stickers feel like a natural part of the decor.
– Use a thin line of decals along a furniture edge to create a playful border.
Tips for best results
– Choose repositionable decals so you can move them as you test spots.
– Peel slowly and re-stick if a spot seems off.
– Test a few placements before pressing fully to walls.
– Keep the overall look balanced; avoid stacking too many icons in one area.
Maintenance and next steps
– When you want a refresh, peel off cleanly with no damage.
– Keep a small stash to rotate themes with your mood or season.
Next steps: pick a theme, gather a few pieces, and start with one wall to see how it changes the room.
18. Customized Pillow Cases
Here is why customized pillow cases are a smart pick. They bring album art into your room in a soft, comfy way.
You can pick a theme, like classic rock or indie, to keep a cohesive look.
What to choose
– High-quality fabric matters for a good look.
– Pick colors that match your bedspread, curtains, or rug.
How to create them
– Use print-on-demand services for quick, tidy results.
– Or try DIY printing at home with iron-on transfers or fabric ink.
– Size art to fit standard pillow sizes like 12×18, 16×16, or 18×24.
Layout ideas
– Mix a single-panel art with a few text-based designs.
– Use different shapes and sizes for a playful look.
– Add a seasonal design swap to refresh the vibe.
– Try a triptych layout with three different album covers.
Seasonal options can keep the room feeling fresh.
Where to place them
– Put a couple on the bed for a bold focal point.
– Tuck a smaller case in a reading nook to draw the eye.
Care and tips
– Wash on gentle with cold water to keep colors bright.
– For best results, line-dry or low heat tumble dry.
– If colors fade, swap in new pillow covers.
Here is the result you get: a cozy, music-loving space that tells your story. Next steps: pick art, choose method, and style your throw pillows.
19. Album Cover Art Books
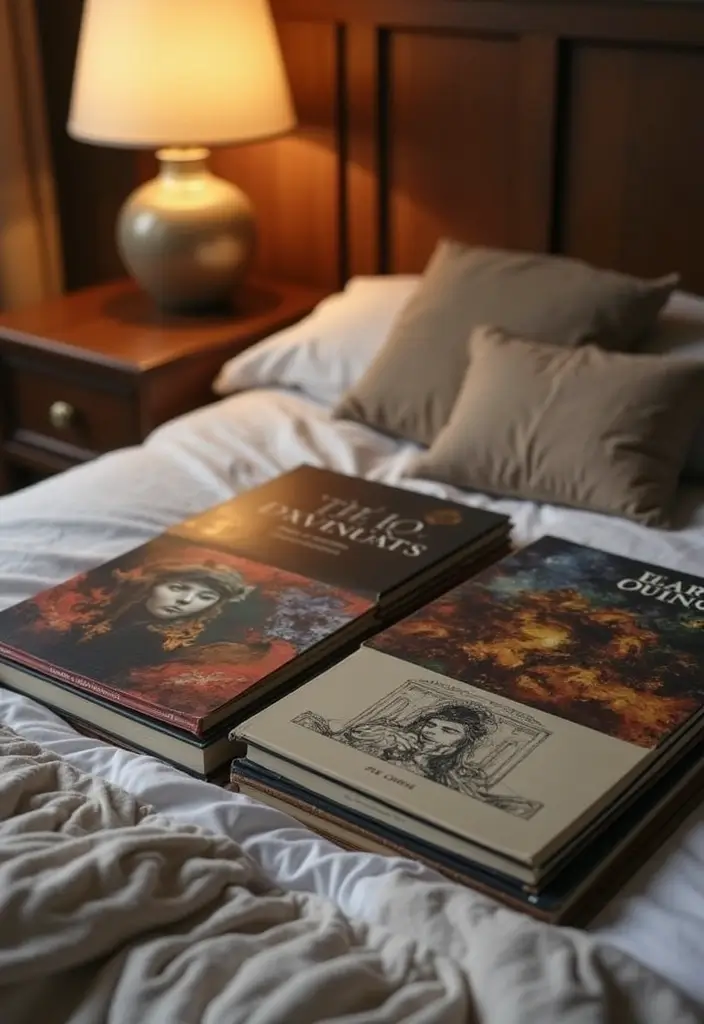
Looking for a classy way to show your music taste without clutter? Album cover art books give style and stories in one view. They sit on a coffee table or beside your bed and invite you to flip through when a song plays.
– Choose album art books that blend eye catching covers with the stories behind them, so you see the art and learn why artists made each image.
– Display them in a tidy trio or quartet on a coffee table so the group acts as a small art wall that catches the eye from across the room.
– Add personal touches with bookmarks or notes that label a cover with a memory or a lyric you love, making the collection feel yours.
– Organize the books by color or mood, so the stack reads like a mini rainbow and brightens a neutral room.
– Create a cozy reading spot nearby with soft light, a comfy chair, and a warm throw so you can enjoy the art while you listen to your records.
With these ideas, your room becomes a small, living gallery that invites music and reading.
Elevate your album cover wall decor bedroom ideas with art books that blend stunning visuals and fascinating stories. They invite you to explore the music behind the art while keeping your space stylishly clutter-free!
20. Artist-Focused Wall Art
Here is why you want artist-focused wall art. It lets you celebrate the people behind the music without making the room feel crowded.
– Statement piece Make oversized art your focal point. Oversized pieces act as a bold anchor in the room. Look for 24×36 inches or bigger.
– Color harmony Pick a palette that echoes your album covers. Use 2–3 colors across all pieces. This keeps the wall calm and makes the display feel connected.
– Smart placement Position the art near your main album displays. A linked setup helps your wall tell one music story. Add a small gallery light to highlight it after dark.
– Balance with smaller items Include smaller prints or accents that reflect the artist’s vibe. This stops the wall from looking loud and busy.
– Practical tips Choose formats like canvas, metal, or framed photos. For budget, order prints on demand or make a DIY collage that fits the space.
– Layout variety Mix different sizes and shapes for interest. Keep even spacing and let one piece lead the eye. Use frames that echo the art and your album covers.
Next steps: decide your artist. Measure the wall. Map the layout with paper cutouts. Then hang the pieces with care.
21. Music Genre Zones
Music Genre Zones
– Decide how many zones you want in the room.
– Plan for 2 to 4 genre areas to keep the space easy to move in and clean.
– Choose colors for each zone to set distinct moods without clashing.
– Fill each zone with album covers, posters, and decor that match the music’s vibe.
– Create a classic rock corner with framed covers, a vintage guitar, rugged textures like leather and metal, and brass accents.
– Design a jazz nook with plush seating, warm lighting, and soft fabrics for a cozy, inviting vibe.
– Add blues or indie walls with vinyl records on display and a small shelf of era-appropriate trinkets, plus a retro clock.
– Use instruments or vintage items to reinforce each theme while keeping clutter low.
– Place the zones so the room flows, using shared colors or a central rug to tie them together nicely.
– Let personal items tell your story in every space by mixing old photos with favorite albums.
– Install lighting that supports each zone, such as warm bulbs for jazz and brighter accents for rock throughout the space.
– Test the layout by walking around the room and moving items until it feels natural.
Next, place items, adjust lighting, and test movement to refine the feel.
22. Modular Art Displays
If you want a fresh look for your bedroom walls, modular art displays can help. You can swap album covers in minutes and keep the mood right for any season. It fits small rooms and big rooms alike.
– Match the room style. Pick frames or mounts that fit your colors and vibe. Wood works well with warm tones. Black metal gives a modern look. A simple white frame reads clean and calm. Choosing the right frame helps the covers pop.
– Designate a dedicated spot. Choose a wall area, a small gallery shelf, or a magnetic strip. Keeping one place makes the display feel intentional. Start with three covers you love.
– Pair with permanent pieces. Add a larger piece or a sturdy shelf nearby. The steady piece anchors the swappable covers and keeps balance.
– Add seasonal shelves. Install a couple of small ledge shelves. Change in new covers, plus a plant or a tiny statue as the seasons shift.
Here is why this setup works: it gives you variety without clutter. Swapping covers is quick, so your space stays alive. Next steps: plan your wall, pick frames, and start swapping. Give it a week and tweak the order.
23. Rustic Wooden Frames
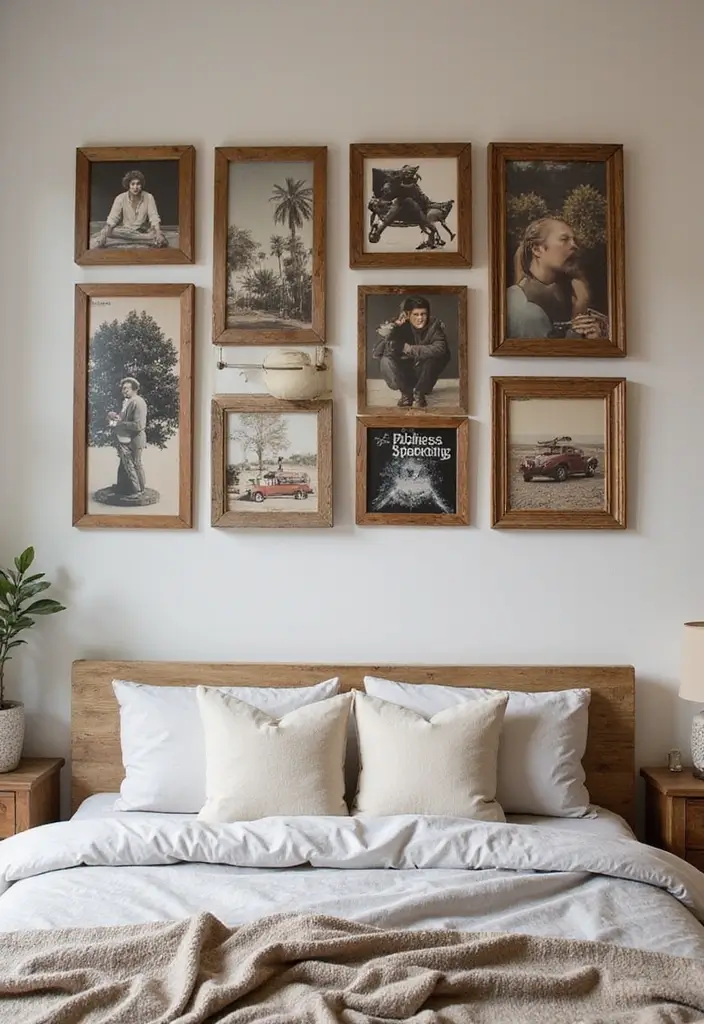
You want your album covers to glow on the wall and feel warm. Rustic wooden frames do that. They bring a homey touch without hiding the art.
Here is how to use them well. Start with the wood. Try pine, oak, or cedar. Keep the finish simple: natural, whitewash, or a dark stain. Distressed wood adds vintage vibe. If you love a clean look, pick the same finish.
Next, mix shapes. Mix square and rectangular frames for texture. Bigger frames can draw the eye to a key album. Small frames fill spaces around it.
Layout ideas are easy. Place above your bed as a focal wall. Or above a desk for daily inspiration. A grid feels neat. A staggered line feels artsy. Do not crowd the space. Leave room to breathe.
Tips to deepen the rustic feel. Pair frames with simple greenery or a small plant. Add photo mats inside the frames to create depth and a softer edge. You can also lean a few frames on a mantle or shelf for a casual vibe.
Next steps: measure your wall, pick 3–6 frames, and test layouts. Your wall will show your music taste and warm the room.
24. Mixed Media Collage
You want wall art that shows your music style. A mixed media collage with album covers can do that. It blends art and sound in one piece.
Here is why it works. It lets you mix colors, fabrics, and textures with your favorite album art. You get a piece that fits your room and mood.
What you need
– A large canvas or sturdy board
– Glue or Mod Podge
– Scissors
– Album covers or pages from records
– Paint or background paper
– Fabric scraps or textured paper
– String or small found objects
– A pencil for planning
– A clear top coat to seal it
How to build it
Plan on the floor first. Place big pieces to shape the layout. Layer smaller bits on top for depth. Add fabric and texture where you want a tactile feel. Tie colors together with a little paint. Glue and let dry. Seal the art.
Tips for impact
Pick a color theme that matches your bed and walls. One large collage can be a bold statement. Update it over time with new covers. Hang it on a color wall to let the pieces pop.
Where to place it
Above the bed or on a blank wall you pass often. It becomes focal point.
25. Personalized Music Map
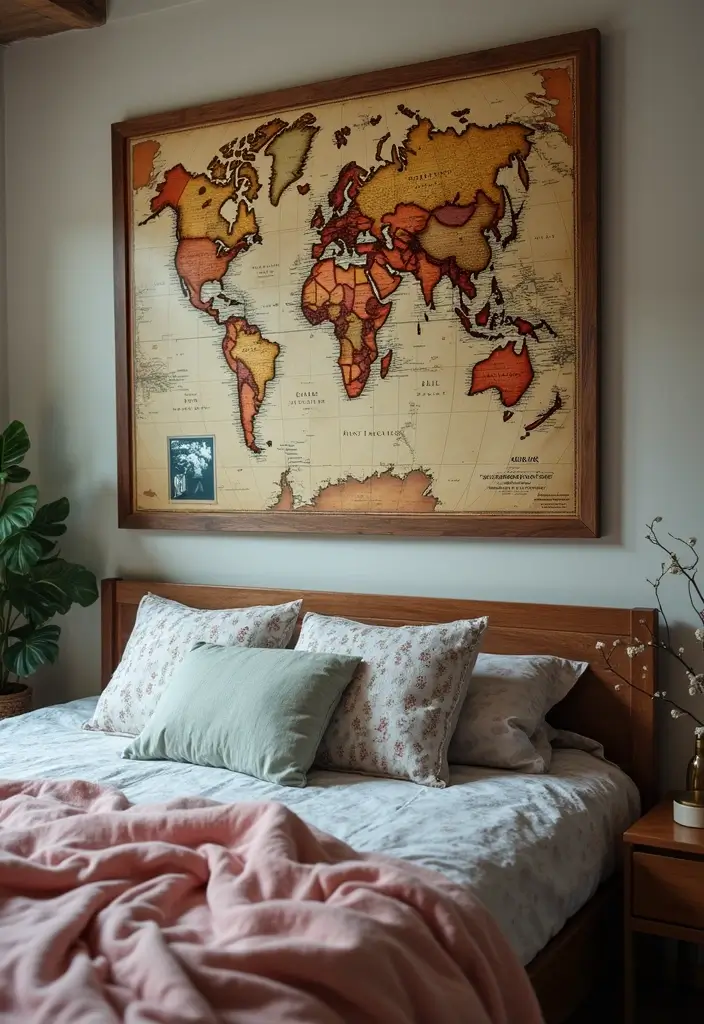
You want wall art that shows your music taste without shouting it.
A personalized music map fits that need by turning memories and places into style.
This wall decor doubles as a conversation starter and a design focal point.
Here is why it works.
What you will build
– Start with a map base that matches your space, such as a world map poster or a cork map.
– Gather supplies like pins, mini album covers, glue, scissors, and a frame.
– Plan your story by choosing places where you found music you love.
– Mark locations with colored pins or stickers so bold colors guide the eye.
– Add small album art prints around the map to tie each pin to a memory.
– Create a simple legend to explain what each pin color means.
– Frame the map or mount it on a sturdy cork board for a clean look.
– Add final touches like a title label and a soft lighting option.
– Swap in new pins as your taste grows to keep the piece fresh.
This setup helps your room feel alive and personal.
It invites friends to ask about your music and travel stories.
You can update it anytime as you discover new bands and albums.
Conclusion
Your bedroom should be a reflection of who you are, and what better way to express that than through music?
These 25 album cover wall decor ideas offer a variety of ways to showcase your style while adding personality to your space. Whether you opt for vintage charm or modern displays, remember that your unique taste is what truly makes your decor special. Dive into these ideas, get creative, and let your love for music shine in your home!
Frequently Asked Questions
What Are Some Creative Ways to Display Album Cover Wall Decor in My Bedroom?
There are so many fun ways to showcase your music style with album cover wall decor! You can try framed album covers for a classic look or go for a collage of music moments that tells your personal story. If you’re feeling adventurous, a wall mural featuring your favorite artist can create a bold statement. Don’t forget about using clipboards for easy rotation of your favorite covers—it keeps your decor fresh and exciting!
How Can I Incorporate Vintage Vinyl Records into My Bedroom Decor?
Incorporating vintage vinyl records into your bedroom decor is a fantastic way to add warmth and personality! Consider using them as wall art by mounting them directly or showcasing their covers in stylish frames. You could also create album art shelves where your best records can shine. Another unique idea is to use a retro suitcase as a display case for your albums, giving a vintage flair while keeping things tidy!
What Are Some Affordable Options for Music-Themed Decor?
Looking for affordable music-themed decor? You can start with album art postcards that are easy to swap out and add vibrant color to your walls. Music-themed wall stickers are another budget-friendly option that allows for playful decor without any permanent commitment. You can even explore DIY options like decoupage album art to create unique pieces that reflect your musical taste while keeping costs down!
How Do I Choose the Right Color Scheme for My Music-Themed Bedroom?
Choosing the right color scheme for your music-themed bedroom can enhance the overall vibe! Start by identifying your favorite album covers and their dominant colors. Use these as inspiration to create a cohesive look. If you prefer a themed music corner, consider segmenting the space with different colors that represent various genres. This not only adds visual interest but also personalizes your decor to reflect your unique style!
Can I Mix Different Styles of Album Cover Wall Decor?
Absolutely! Mixing different styles of album cover wall decor can create an eclectic and personalized look in your bedroom. Consider combining rustic wooden frames with modern modular art displays for a dynamic feel. You can also blend artist-focused wall art with your favorite album covers to celebrate both the music and the artists behind it. Just be sure to maintain a balance so your decor feels harmonious rather than chaotic!
Related Topics
album cover decor
music-themed decor
vintage vinyl
DIY wall art
bedroom decor
creative wall displays
easy decor ideas
personalized music art
collage wall art
framed album covers
retro aesthetics
music-inspired home