Are you tired of staring at an ugly ceiling that pulls down the entire vibe of your space? You’re not alone. Many people living in smaller homes or on a budget face this same challenge. This post is here to help you transform those plain or damaged ceilings into something beautiful without breaking the bank. Whether you’re a seasoned DIYer or just dipping your toes into home improvement projects, these wood panel ceiling ideas will inspire you to get creative and elevate your interior design.
If you’re someone who appreciates budget-friendly decor that adds character to your home, then you’ll find this guide invaluable. We’ve compiled 15 unique wood ceiling ideas that are perfect for small spaces. From rustic shiplap charm to sleek minimalist designs, these styles cater to various tastes and preferences. You’ll walk away with practical, easy-to-implement solutions that can fit into any decor scheme. So, grab your tools and let’s dive into the world of DIY ceiling design!
Key Takeaways
– Discover 15 affordable wood panel ceiling ideas that can revamp your space and cover up unsightly ceilings.
– Explore various styles, such as rustic shiplap, faux wood beams, and textured wood panels, to find what matches your personality and decor.
– Learn how to incorporate greenery and lighting for added flair and ambiance in your room.
– Get hands-on tips for using reclaimed wood, DIY pallets, and upcycled materials to stay eco-friendly while enhancing your interior.
– Find actionable advice on installation techniques and design elements that can boost the aesthetic value of your home without a hefty price tag.
1. Shiplap Charm for a Rustic Look
Shiplap is a timeless choice in home decor that brings warmth and rustic charm to any space. This classic wood paneling not only covers flaws but also introduces a cozy, inviting atmosphere. For instance, pairing shiplap with soft white walls or natural wood beams creates a beautiful contrast that enhances the overall aesthetic.
To make the most of this look, consider using pre-finished boards to save time. Mount the panels horizontally for a wider feel or vertically to draw the eye upward. Mixing light and dark shades can add a modern twist to the traditional shiplap design.
Consider these practical tips:
– Pair shiplap with soft white walls to enhance contrast
– Install panels horizontally for a spacious effect
– Use a two-tone palette for a modern touch
– Finish with a clear coat for durability and shine
This approach not only beautifies your ceiling but also creates a warm and inviting space with layered textures that add depth.
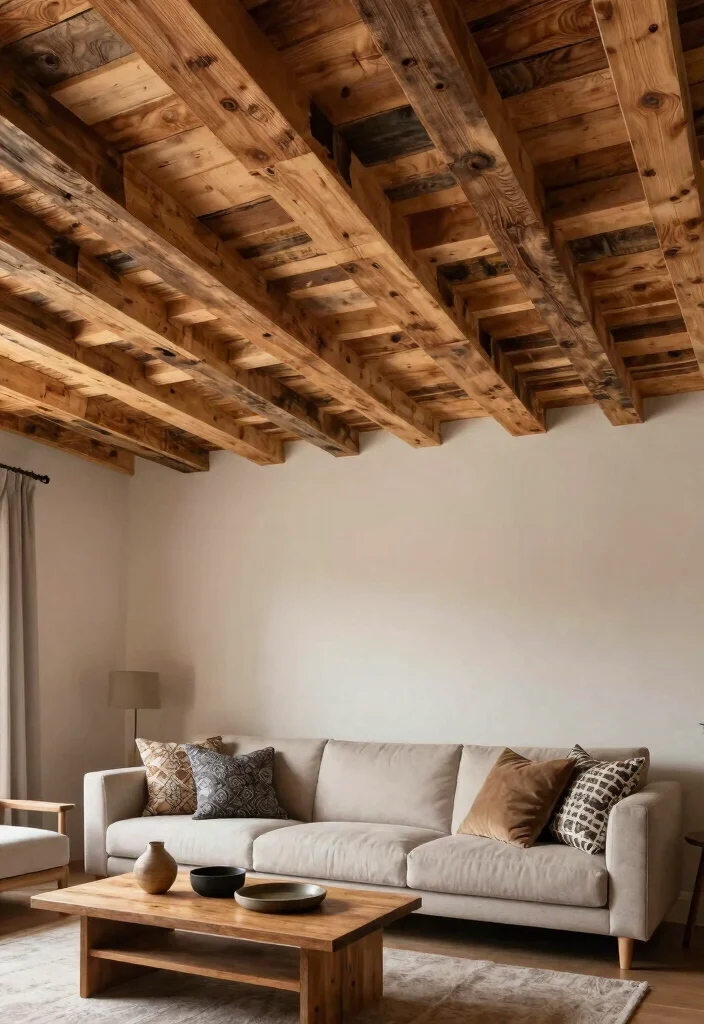
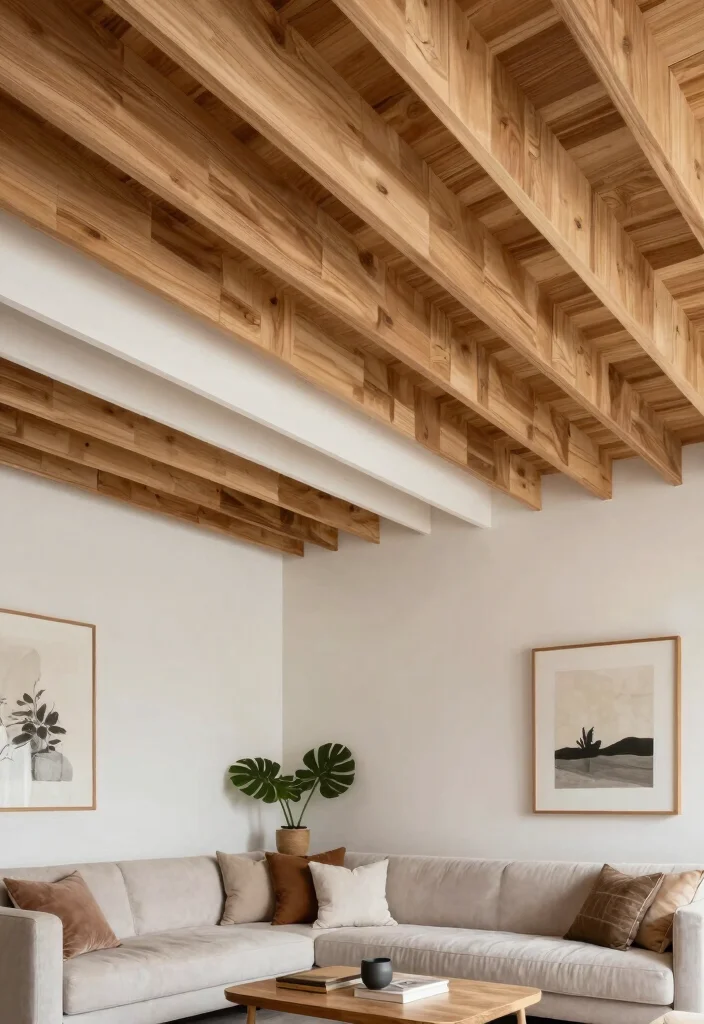
2. Faux Wood Beams for Elegant Touch
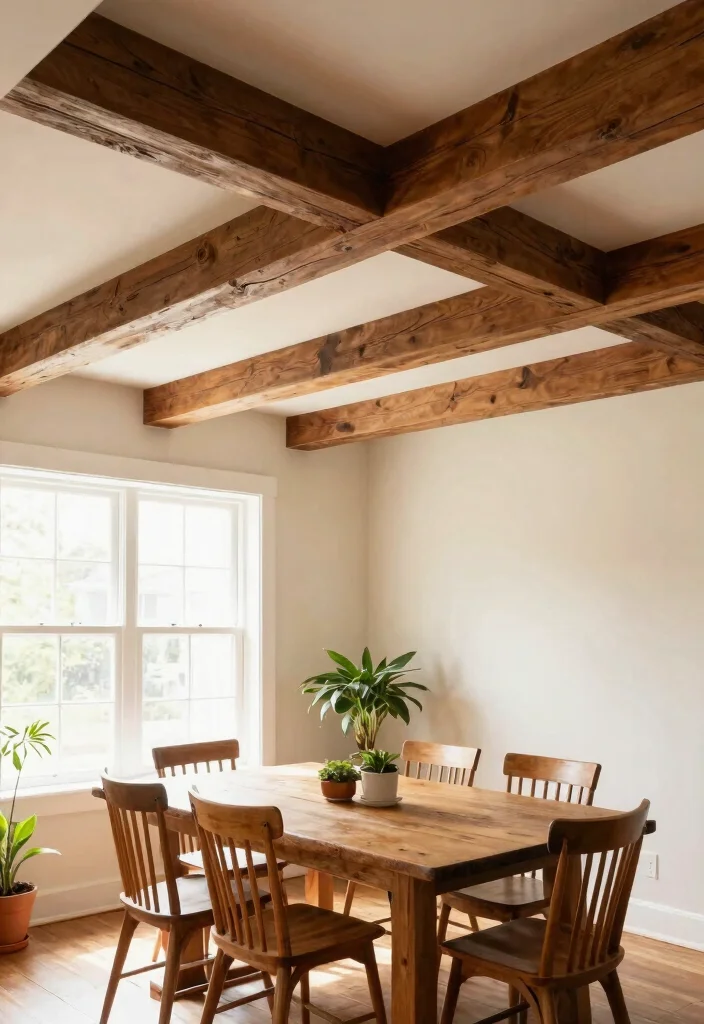
Faux wood beams offer a sophisticated touch to your home without the expense of real wood. These lightweight structures enhance your ceiling’s architecture while providing a stylish aesthetic. For example, placing them in a grid pattern can create a dramatic focal point, especially in larger rooms.
To achieve this look on a budget, opt for beams that can be easily installed and found at most home improvement stores. Staining the beams in rich hues adds warmth and brings a classic feel to the space. You can enhance smaller areas like hallways with these beams to create an illusion of depth and style.
Implement these ideas:
– Install faux beams in a grid pattern for drama
– Stain in rich colors to mimic real wood
– Pair with soft lighting for an inviting ambiance
This design choice not only elevates the ceiling but also creates a cozy environment that’s both stylish and functional.
Cost Breakdown & Budget Planning
When you’re planning to install a wood panel ceiling, understanding your budget is key. This section will help you break down your costs, so you can make informed decisions.
Cost Breakdown by Category:
– Materials/Products: You can expect to spend between $1 to $5 per square foot for wood panels. Premium options like reclaimed wood can go up to $10 per square foot.
– Tools/Equipment: If you don’t already own tools, renting or purchasing basic tools like a circular saw and drill will typically cost you around $50 to $150.
– Labor/Professional Installation: If you choose to hire someone, labor can range from $300 to $800, depending on the complexity of the installation and the size of your space.
– Optional Extras: Decorative trim or paint can add another $100 to $500 to your budget, depending on the style you want.
Budget Tier Breakdown:
Basic Economy Tier £/€/$
– What’s included: This tier includes basic plywood or MDF panels, basic tools, and minimal decor. You might spend around $200 to $400.
– Good for: Small DIY projects or quick fixes in less visible areas like a basement or laundry room.
– Limitations: You’ll miss out on aesthetic appeal and durability. The finish may not look as polished.
Mid-Range Tier ££/€€/$$
– What’s included: This option includes better-quality wood options like pine or cedar, decent tools, and some decorative elements, costing between $500 to $1,200.
– Good for: Homeowners looking to enhance a living room or dining area with a wood panel ceiling that looks great.
– Best value for: Most people who want a balance between quality and cost, providing a pleasing look without breaking the bank.
Premium Tier £££/€€€/$$$
– What’s included: You get high-quality materials such as reclaimed wood, professional installation, and added decorative features, often costing over $1,500.
– Good for: Those wanting a stunning centerpiece in a main area of their home.
– Worth it if: You want the best look and durability and are planning to stay in your home long-term.
Money-Saving Tips:
– Shop Sales: Look for discounts on wood panels, especially during seasonal sales. You can save a significant amount this way.
– DIY Installation: If you have some basic skills, consider installing the panels yourself to reduce labor costs.
– Use Leftover Materials: Get creative with leftover wood from other projects. You can use it for accent pieces or trim.
– Buy in Bulk: Purchase larger quantities of materials at once to take advantage of bulk pricing.
Where to Splurge:
– Quality Wood: Going for higher-quality wood ensures durability and a better aesthetic. This investment pays off in the long run.
– Professional Installation: Hiring a professional can save you time and ensure a flawless finish, especially if you’re not experienced in DIY projects.
By planning your budget carefully, you’ll navigate the costs of creating a stunning wood panel ceiling. This makes your space not only beautiful but also functional without blowing your budget. Happy decorating!
3. Painted Wood Panels for a Pop of Color
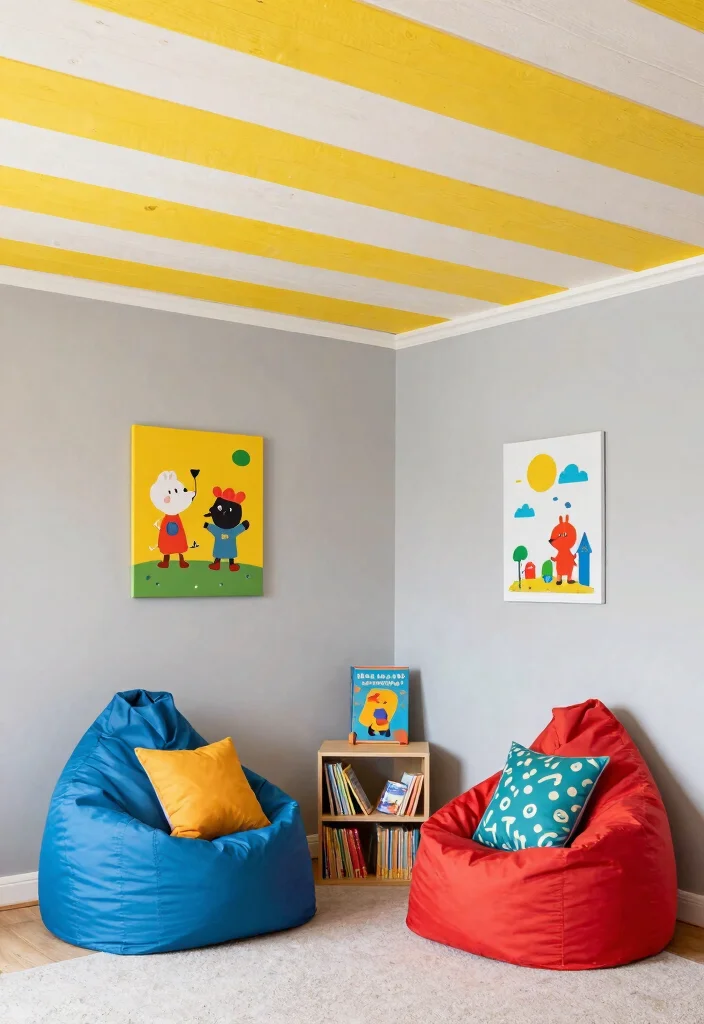
Transform your ceiling into an artistic statement by painting wood panels in vibrant colors or playful patterns. This approach can infuse your space with personality and joy. For instance, using bold hues that contrast with your wall color can create a lively focal point that grabs attention.
To make this project accessible, use stencils for clean designs or experiment with freehand painting for a more personal touch. Consider applying a mural or a calming sunset effect to inspire creativity in your home. Ensure you select paint suitable for wood surfaces to maintain durability and vibrancy.
Try these creative tips:
– Paint panels in contrasting colors for a bold statement
– Use stencils for precise patterns and designs
– Create a mural for a unique artistic touch
This colorful approach not only brightens your ceiling but also allows you to express your individual style in an imaginative way.
Painted wood panels can turn a tired ceiling into a high-impact feature—without breaking the budget. Try bold hues or simple stencils to create a pop of color on your wood panel ceiling that sparks joy every time you look up.
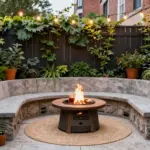
4. Wood Planks and Greenery for a Natural Vibe
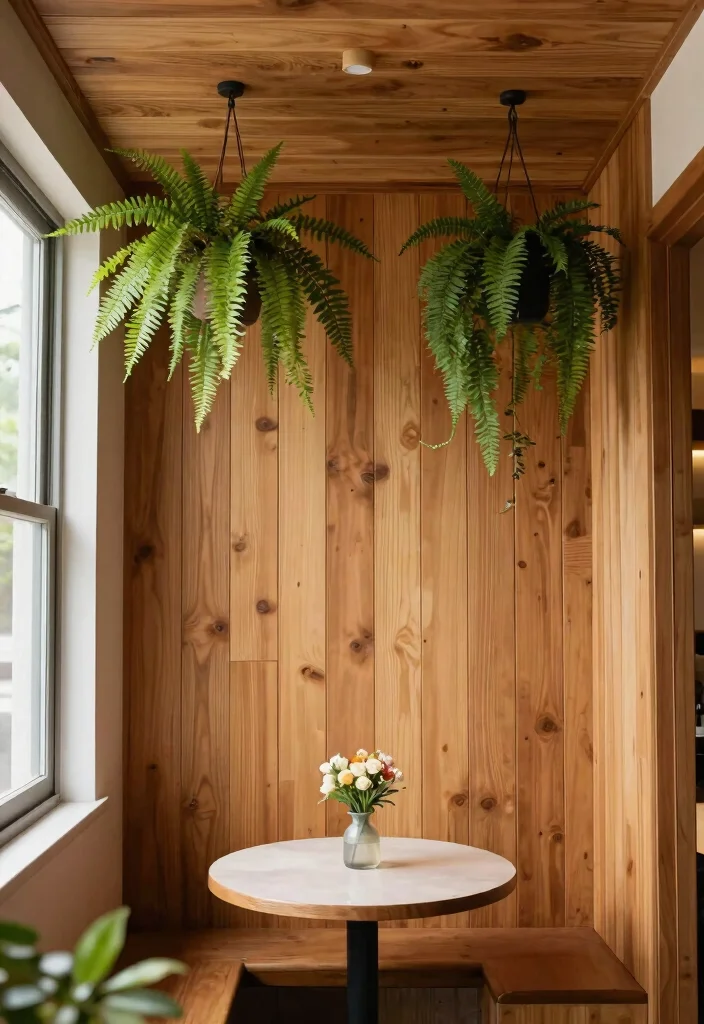
Bringing nature indoors can be as simple as combining wood paneling with hanging plants. This design not only conceals the ceiling but also breathes life into your space. For a stunning effect, arrange lightweight wood panels in an organic layout and intersperse them with greenery.
Consider adding hooks or small shelves for trailing plants like pothos or ferns, which can elegantly cascade down, enhancing the inviting atmosphere. This look works especially well in cozy dining areas or reading nooks, where a touch of nature can create a peaceful retreat.
Incorporate these elements:
– Arrange wood panels organically for visual interest
– Install hooks for hanging trailing plants
– Select plants that thrive in your lighting conditions
This natural combination not only beautifies your ceiling but also fosters a serene environment, connecting your indoor space with the great outdoors.
Fun fact: Mixing lightweight wood planks with greenery instantly elevates a space—hang 2–3 hooks for trailing plants like pothos and ferns. In just a weekend, a natural wood panel ceiling turns a cozy dining nook into a lush, inviting retreat.
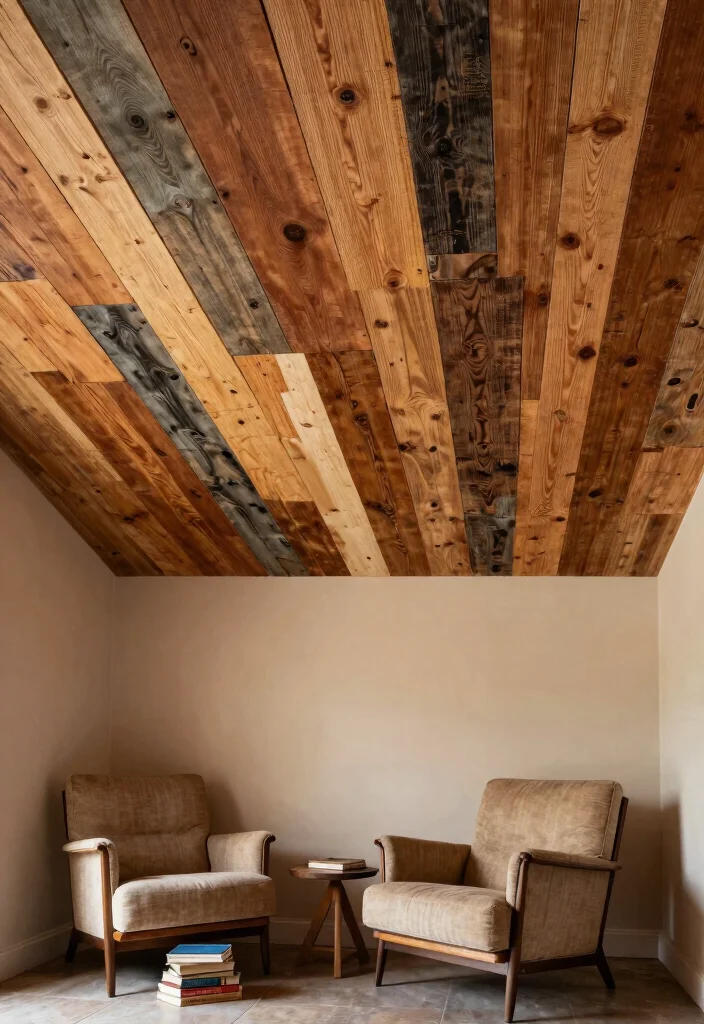
5. Reclaimed Wood for Eco-Friendly Elegance
Reclaimed wood is an eco-friendly choice that adds character and warmth to your ceiling. This sustainable option brings history into your home, making each piece unique. Look for materials like old barn wood or salvaged furniture to create a truly one-of-a-kind ceiling that tells a story.
To achieve a cohesive look, lightly sand the wood and apply a clear sealant to protect it while showcasing its natural beauty. This rustic charm pairs beautifully with vintage decor, adding a sense of authenticity to your space.
Consider these suggestions:
– Use reclaimed barn wood for a rustic look
– Sand and seal wood for longevity and shine
– Pair with vintage furnishings for a unified aesthetic
Opting for reclaimed wood enhances your ceiling while promoting sustainability, creating a warm and inviting atmosphere in your home.
6. Wood Ceiling Tiles for Easy Installation
Wood ceiling tiles are a fantastic option for those seeking a quick and stylish upgrade. These tiles can be easily glued to your ceiling, making installation straightforward and hassle-free. With various styles available, you can find the perfect design to match your interior decor.
Choose lightweight tiles that may also offer added insulation benefits. Mixing and matching styles can create a unique pattern that reflects your personality and style. This easy installation makes it perfect for small spaces needing a quick refresh.
Implement these ideas:
– Glue wood tiles directly to the ceiling for easy installation
– Mix different styles for a custom look
– Select lightweight tiles to enhance insulation
This project not only elevates your space but also allows for a swift and impactful transformation that can be enjoyed immediately.
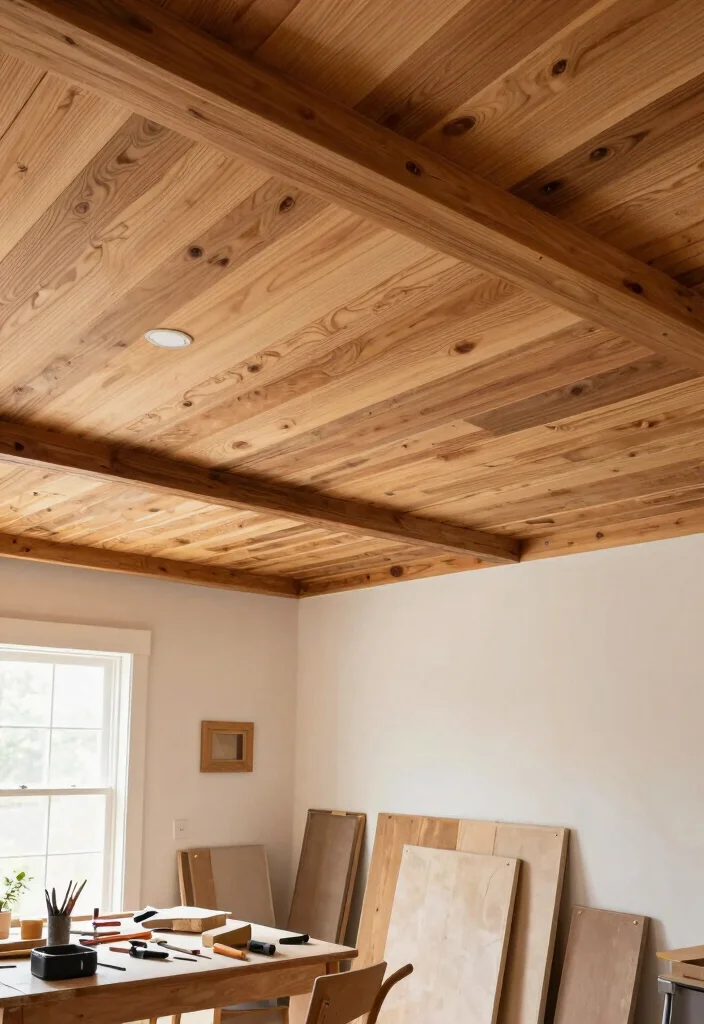
7. DIY Wood Paneling with Pallets
Repurposing wooden pallets is an affordable and creative way to achieve a chic wood panel ceiling. This sustainable DIY project is perfect for those looking to add character without breaking the bank. Start by disassembling the pallets and sanding the wood to ensure a smooth finish.
Arrange the pieces in a staggered pattern when attaching them to the ceiling for added visual interest. You can keep the natural wood for a rustic aesthetic or paint it to match your decor. This project gives you a personalized ceiling that speaks to your creativity.
Try these steps:
– Disassemble pallets and sand wood for a smooth finish
– Attach panels in a staggered pattern for depth
– Paint or leave natural for your desired look
This DIY project not only enhances your ceiling but also serves as a conversation starter, showcasing your dedication to creativity and sustainability.
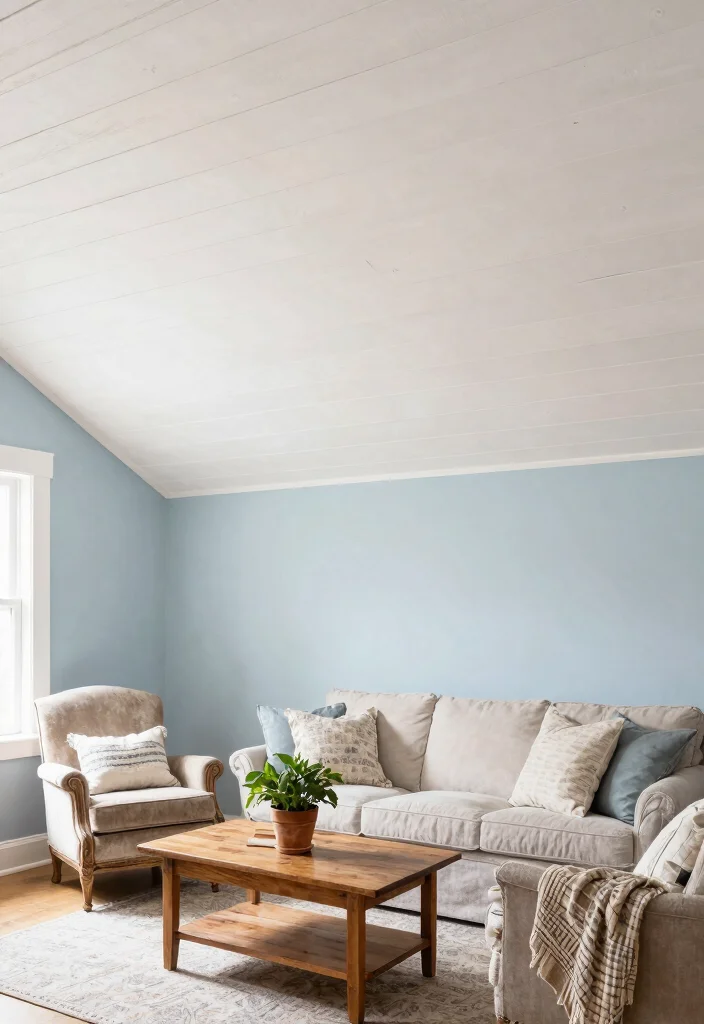
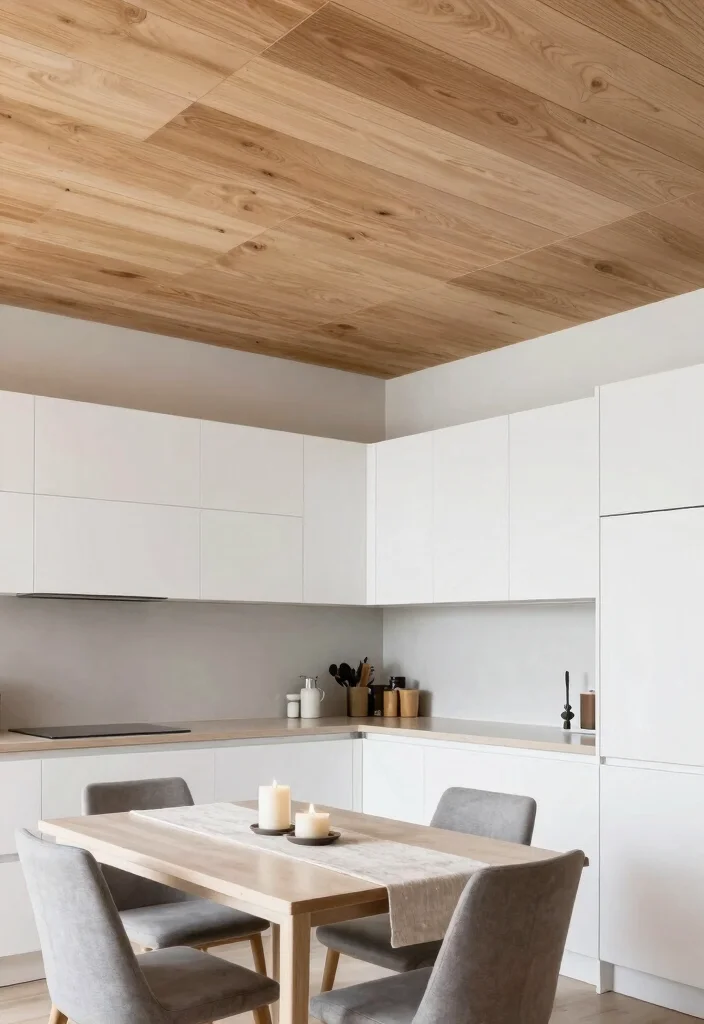
8. Minimalist Wood Ceiling for Modern Spaces
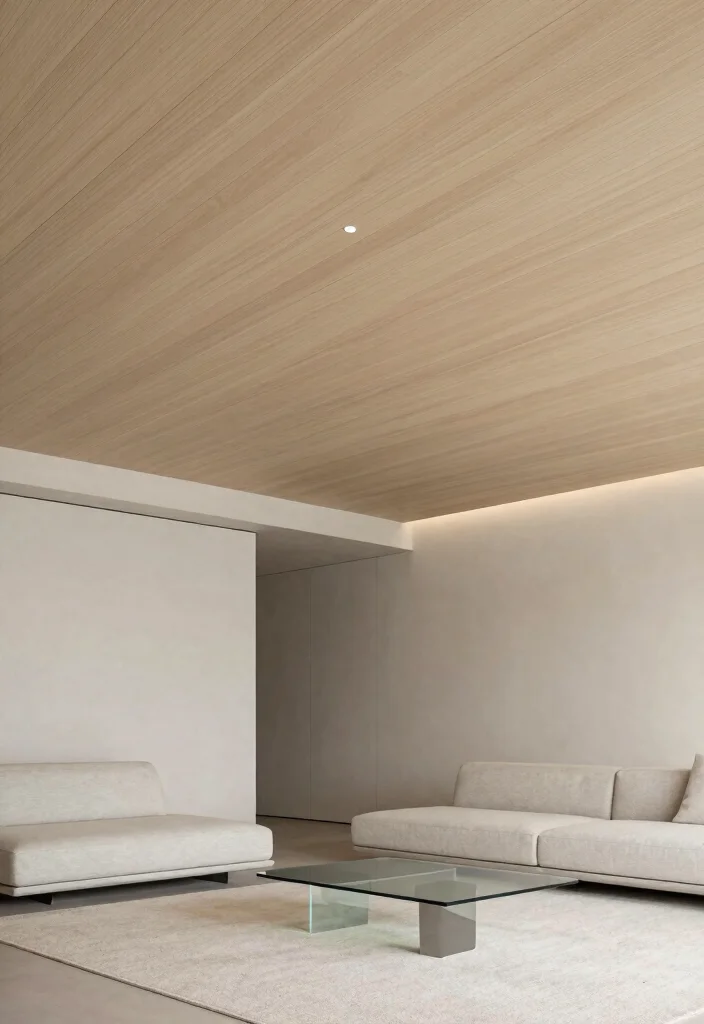
A minimalist wood ceiling creates a clean, modern aesthetic that enhances your home’s overall feel. By using thin strips of wood arranged in simple patterns, you can achieve a sleek and sophisticated look. This design works particularly well in smaller spaces, allowing light to reflect off the surfaces and making the area feel larger.
Select light wood tones and maintain a straightforward design to achieve a polished finish. Pairing this ceiling with neutral walls and minimalist furniture can create an airy, open atmosphere that feels tranquil and inviting.
Implement these ideas:
– Use thin strips of wood for a sleek look
– Choose light tones for an airy feel
– Pair with neutral decor for a cohesive design
This minimalist approach not only beautifies your ceiling but also creates a serene environment that enhances relaxation and clarity.
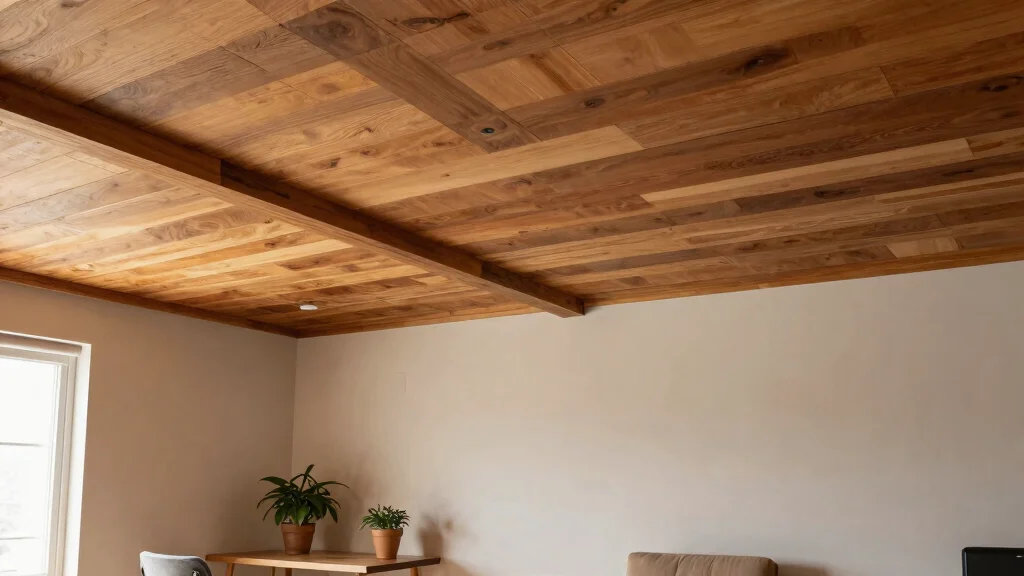
9. Textured Wood Panels for Added Interest
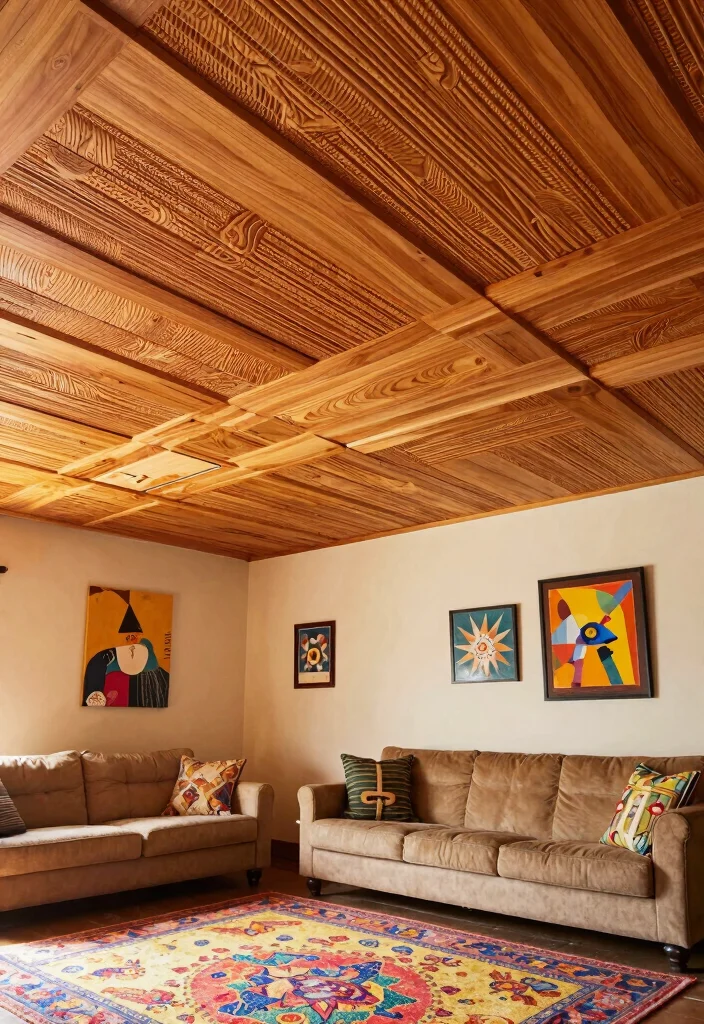
Textured wood panels can make your ceiling a striking focal point with their unique depth and character. Opt for panels featuring grooves or ridges to create charming shadows and visual intrigue. This design is ideal for smaller spaces, where a cozy atmosphere is desired.
Painting the textured panels in bold colors or leaving them in their natural state can enhance their rustic appeal. Combining these panels with soft furnishings creates a striking contrast that adds to the room’s warmth.
Consider these ideas:
– Choose panels with unique textures for visual interest
– Paint in bold colors or leave natural for charm
– Combine with soft furnishings for contrast
This approach not only adds dimension to your ceiling but also enriches the overall ambiance of the space, making it feel inviting and stylish.
10. Wood Ceiling with Accent Lighting
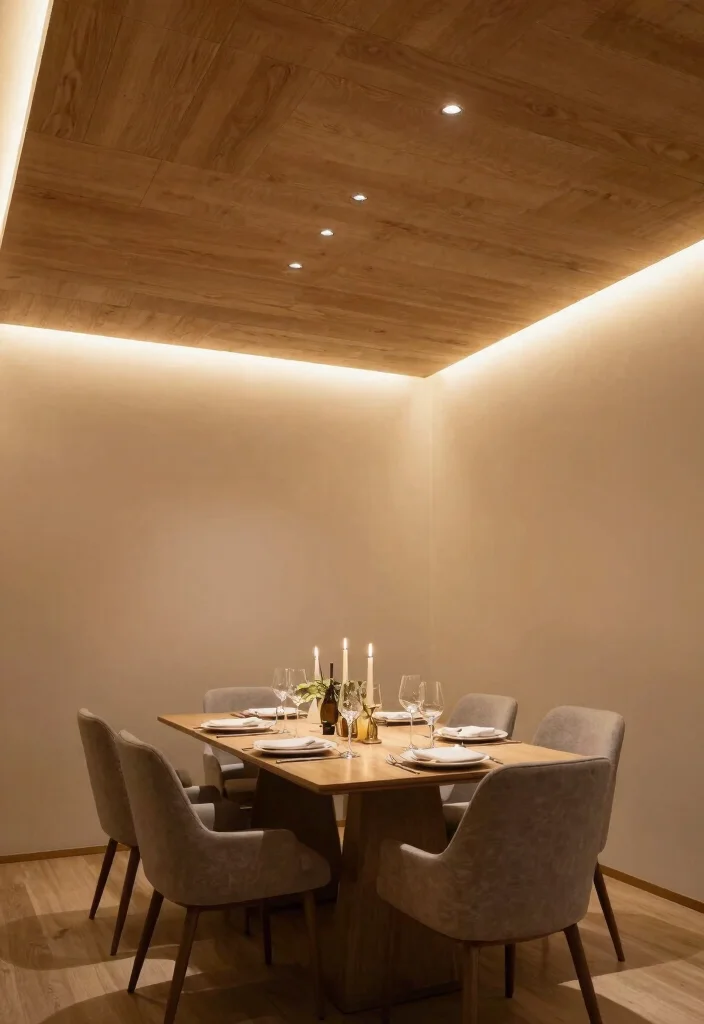
Elevate your wood panel ceiling by incorporating accent lighting that highlights its beauty. This design not only showcases the wood but also infuses warmth and ambiance into your space. Consider using LED strip lights or recessed lighting along the edges for a subtle glow that transforms the atmosphere.
Pendant lighting can also create a stunning focal point, especially in dining areas or living rooms where mood lighting is crucial. With a variety of light fixtures available, you can easily find one that complements your decor style.
Implement these suggestions:
– Use LED strip lights for soft, ambient lighting
– Install pendant lights for a striking focal point
– Match fixtures to your decor style for cohesion
This combination enhances your ceiling while providing the necessary illumination, creating a warm and inviting atmosphere that draws people in.
Fun fact: LED accent lighting along a wood panel ceiling can cut energy use by up to 80% compared to incandescent fixtures. It also lasts 25x longer, turning warm ambiance into a practical budget boost for small spaces.
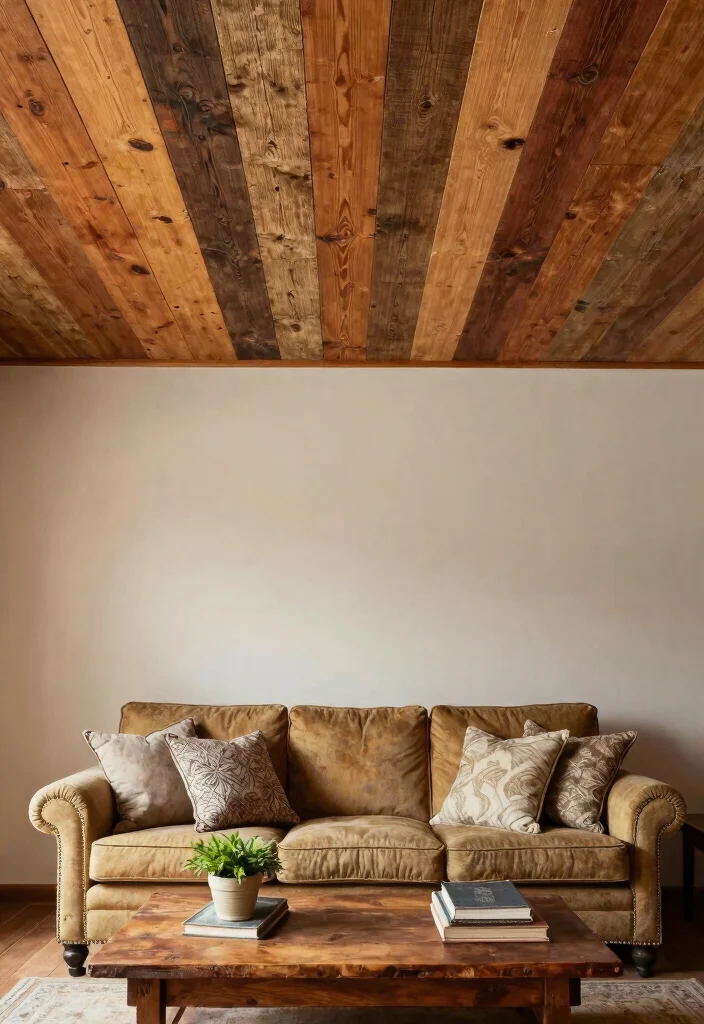
11. Layered Wood Panels for Depth
Layering wood panels on your ceiling creates a sense of depth and craftsmanship. This technique involves installing panels at varying levels, which adds visual interest and texture to the space. You can use different widths or orientations of wood, or even mix in other materials like drywall for a unique look.
Selecting contrasting colors or complementary shades can enhance the design’s elegance, making it a stunning feature in any room. This approach is especially effective in cozy spaces, where the added dimension can feel like art overhead.
Try these ideas:
– Layer panels at different levels for depth
– Mix different widths for added interest
– Use contrasting colors for elegance
This layered design not only beautifies your ceiling but also enriches the room’s overall character and style.
12. Decorative Wood Trim for a Stylish Finish
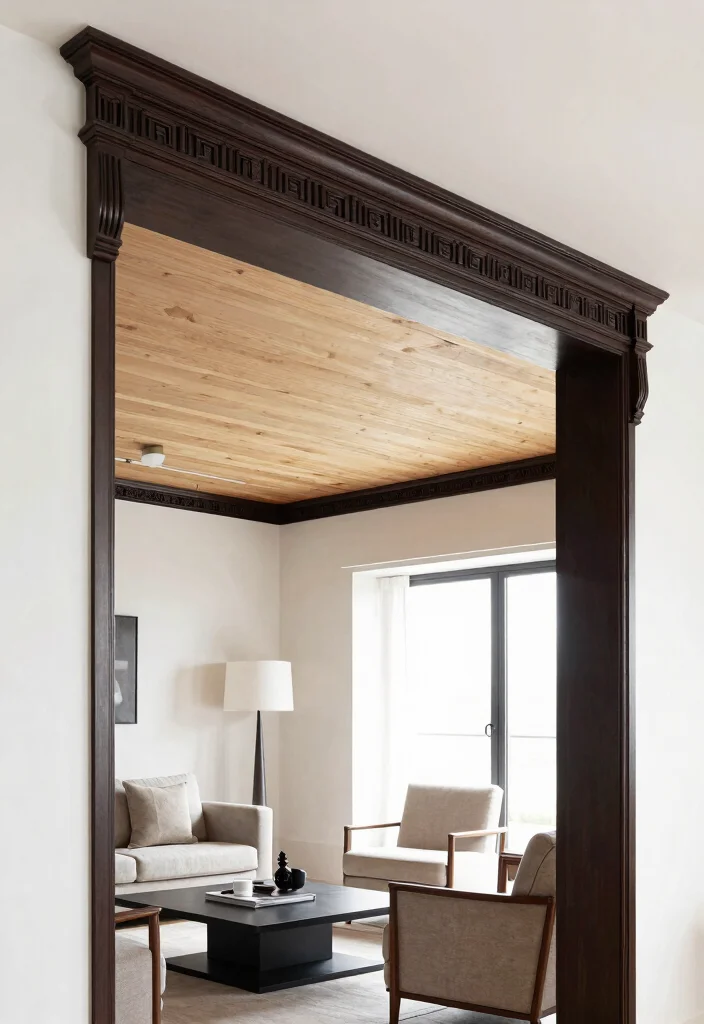
Incorporating decorative wood trim around your ceiling edges can provide a finished, stylish look. This budget-friendly accent enhances the overall appearance while effectively covering any imperfections. Opt for crown molding or simple wood trim to frame your ceiling beautifully.
Choosing a contrasting paint color for the trim can make it pop, while a natural wood tone can create seamless integration with the wood panels. This small addition has a significant impact, especially in smaller rooms where every detail counts.
Consider these options:
– Use crown molding for a classic touch
– Choose contrasting colors for visual interest
– Integrate trim with other wood elements for cohesion
This decorative trim enhances your ceiling’s aesthetics, creating a polished look that ties the entire room together.
13. Wood Ceiling with Wallpaper for Unique Flair
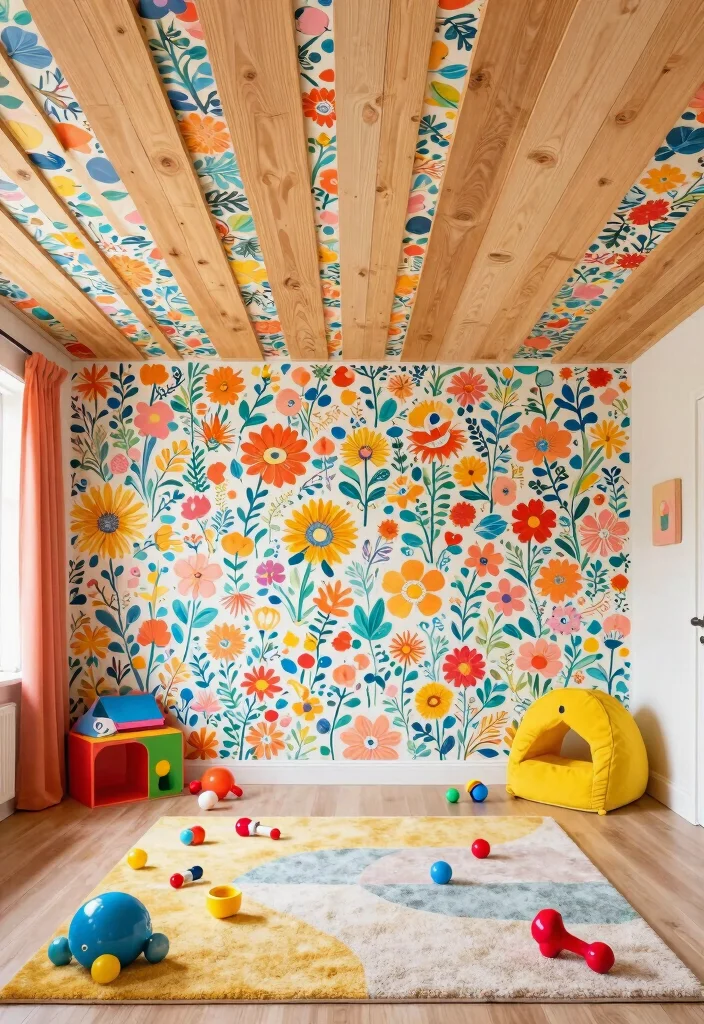
Combining wallpaper with wood paneling offers a creative twist that adds personality to your ceiling. This method allows for playful patterns or colors while maintaining the warm feel of wood. Start by installing a fun wallpaper design directly on the ceiling before applying wood panels over it, allowing the wallpaper to peek through.
This layering technique is perfect for quirky spaces like home offices or playrooms, offering a unique opportunity to showcase your style. By combining the rustic texture of wood with vibrant wallpaper, you create a ceiling that feels alive and inviting.
Implement these ideas:
– Install wallpaper under wood panels for a unique look
– Choose fun patterns to express personality
– Create a layered effect that adds depth
This creative approach not only enhances your ceiling but also brings joy and character to your home environment.
14. Upcycled Wood Panels for Creative Style
Upcycling old wood planks is a sustainable and imaginative way to create a unique ceiling. This DIY approach allows you to repurpose materials while adding a personal touch to your home. Look for wood pieces from furniture, pallets, or fencing to craft a beautiful ceiling that tells a story.
Experiment with creative patterns or stick to a uniform look for a streamlined design. This budget-friendly project not only adds character but also infuses your space with history and charm.
Consider these suggestions:
– Use planks from old furniture for character
– Arrange in creative patterns for visual interest
– Stick to a uniform look for a sleek design
This upcycling project enhances your ceiling while celebrating sustainability, creating a distinctive and stylish environment.
15. Acoustic Panels with Wood Finishing
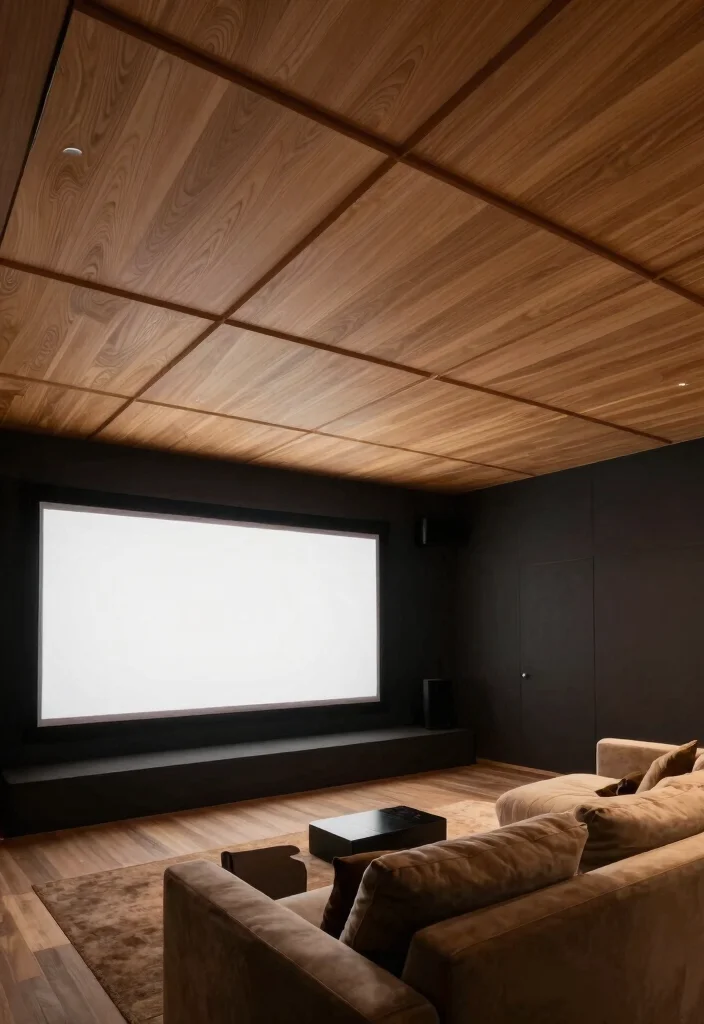
Acoustic panels serve a dual purpose by improving sound quality while adding style to your wood ceiling. These panels can be covered with wood veneer or patterned fabric, enhancing both aesthetics and functionality. This is particularly beneficial in spaces like home theaters or music rooms, where sound absorption is key.
Customize the panels by selecting various wood finishes to match your decor, creating a cohesive look that looks great and performs well. This design combines beauty with practicality, making it ideal for the modern home.
Implement these ideas:
– Cover acoustic panels with wood veneer for style
– Choose finishes that complement your decor
– Use in spaces where sound quality is essential
This approach enriches your ceiling with both beauty and functionality, making it a smart choice for any room.
Conclusion
Embracing wood panel ceilings can revitalize your living space without straining your budget. Each of these ideas offers a unique approach to covering up unsightly ceilings while incorporating your personal style.
With a little creativity and effort, your ceilings can become a stunning focal point in any room. So grab your tools and some materials, and get ready to transform your home into a cozy, stylish retreat!
Frequently Asked Questions
Question: What are the best wood ceiling ideas to cover an ugly ceiling on a budget?
Answer: There are several wood panel ceiling ideas that won’t break the bank. For a classic look, beadboard or shiplap panels are affordable and install easily as a wood panel ceiling solution. Reclaimed or thrifted boards can add charm while keeping costs down. Start by measuring the room, choosing narrow boards to reduce waste, and using inexpensive furring strips so you don’t have to tear out existing ceiling structure. Then finish with a clear sealant or a light stain to highlight the grain. These wood ceiling ideas are ideal for budget-friendly decor in small spaces.
Next, plan a quick DIY ceiling design by outlining a simple grid or diagonal layout to add visual interest without expensive materials. A white or pale finish can keep the space feeling open, while a tinted finish can add warmth.
Question: How can I install a wood panel ceiling in a small space without a major renovation?
Answer: You can transform a ceiling with a few practical steps that fit a small space and a tight budget. Start with a simple plywood or MDF panel approach, or classic beadboard panels nailed to lightweight furring strips. Use a level, a stud finder, and a pneumatic nailer for quick DIY ceiling design. Leave expansion gaps and apply a finish before installation so you don’t have to handle wet paint in tight corners. This keeps home improvement projects doable without messy remodeling. If you’re after a truly budget-friendly decor upgrade, consider pre-finished panels that snap together, reducing time and mess.
Tip: work from one corner to the opposite wall, pre-cut panels for outlets and fixtures, and seal edges to protect from humidity. This approach preserves your small space while delivering a durable, attractive wood panel ceiling.
Question: What materials are most cost-effective for a wood panel ceiling?
Answer: For a budget-friendly wood panel ceiling, you’ll want to compare MDF beadboard, pine boards, or plywood planks. Reclaimed wood can add character at a lower cost if you source it wisely. Vinyl or composite panels with a wood grain finish are another option for damp areas. Pros and cons: MDF is smooth and cheap but can warp if moisture gets in; pine is affordable and easy to work with; plywood is sturdy and versatile. Finish with a sealant or stain to protect from humidity in kitchens or bathrooms. Tip: choose panel widths that minimize waste and use a simple nailer to keep costs down. This keeps the project aligned with budget-friendly decor and DIY ceiling design goals.
Question: How should I finish and maintain a wood panel ceiling for longevity?
Answer: Finish matters almost as much as the panels themselves. Apply a water-based polyurethane or wood stain and sealer to protect the wood panel ceiling from humidity and cooking steam. Keep dust to a minimum with regular light cleaning, and reapply finish every few years or as needed. In small spaces, ensure good ventilation and avoid water pooling near fixtures. A proper finish makes maintenance easier and helps your interior design tips shine alongside the wood panel ceiling look.
Bonus: choose a satin or matte finish to reduce glare and keep the room feeling open, which is especially important in budget-friendly decor.
Question: Will a wood panel ceiling make my small space feel cozier or cramped, and how can I optimize lighting and color?
Answer: It depends on your finish and color choices. Lighter stains or whitewashed boards reflect more light, helping a small space feel bigger, while darker tones add warmth and coziness. Pair the ceiling with bright, layered lighting—recessed lights, sconces, and a focal pendant—to balance shadows and enhance the interior design tips. Use mirrors or glossy surfaces on walls to bounce light, and keep the rest of the decor simple to avoid a boxed-in feel. This approach aligns with budget-friendly decor and DIY ceiling design principles, so you get a polished wood panel ceiling without overwhelming the room.
Related Topics
wood panel ceiling
budget-friendly decor
DIY ceiling design
home improvement projects
small spaces
interior design tips
easy upgrades
rustic style
modern aesthetics
beginner friendly
affordable solutions
quick fixes